


.svg)
With horizontal scrolling users of our page will not only go up and down, they will move sideways, and with that, you can have a great user experience.
Let’s think our website is like a long drawing on a piece of paper. Usually, you move the paper up and down to see everything. But with horizontal scroll, you can also move the paper left and right to explore parts of the picture that are spread out sideways! It’s like looking at a big picture book where you turn the page left or right to see more.
Why use a horizontal scroll?
Of course, this is subjective, there are probably hundreds of reasons why someone would use a horizontal scroll, but let's mention a few. For example, if you have a super wide picture, like a panoramic photo of a beautiful landscape, a horizontal scroll helps you see it all without resizing it down. Or, if you have some interactive story you want to share, now, imagine telling a story where you move through different scenes by sliding left and right. It could look like your users flipping through the book.
And my favorite reason, let's say sometimes you want to show things in a unique way. For example, a timeline of history or a fancy showcase of Webflow projects for potential clients, that can look cool with horizontal scroll.
How to Create Horizontal Scroll in Webflow
So, let’s not waste any more time, I'll guide you step by step. We will first add a section that we can name Track and set a height of 400vw. In this example we will scroll horizontally across four things, that’s why we have 400vw. VW stands for Viewport Width and the viewport is the part of the screen where you see everything. So, 100vw means the whole width of the screen. In our case, 400vw means 4 times the whole width of the screen.

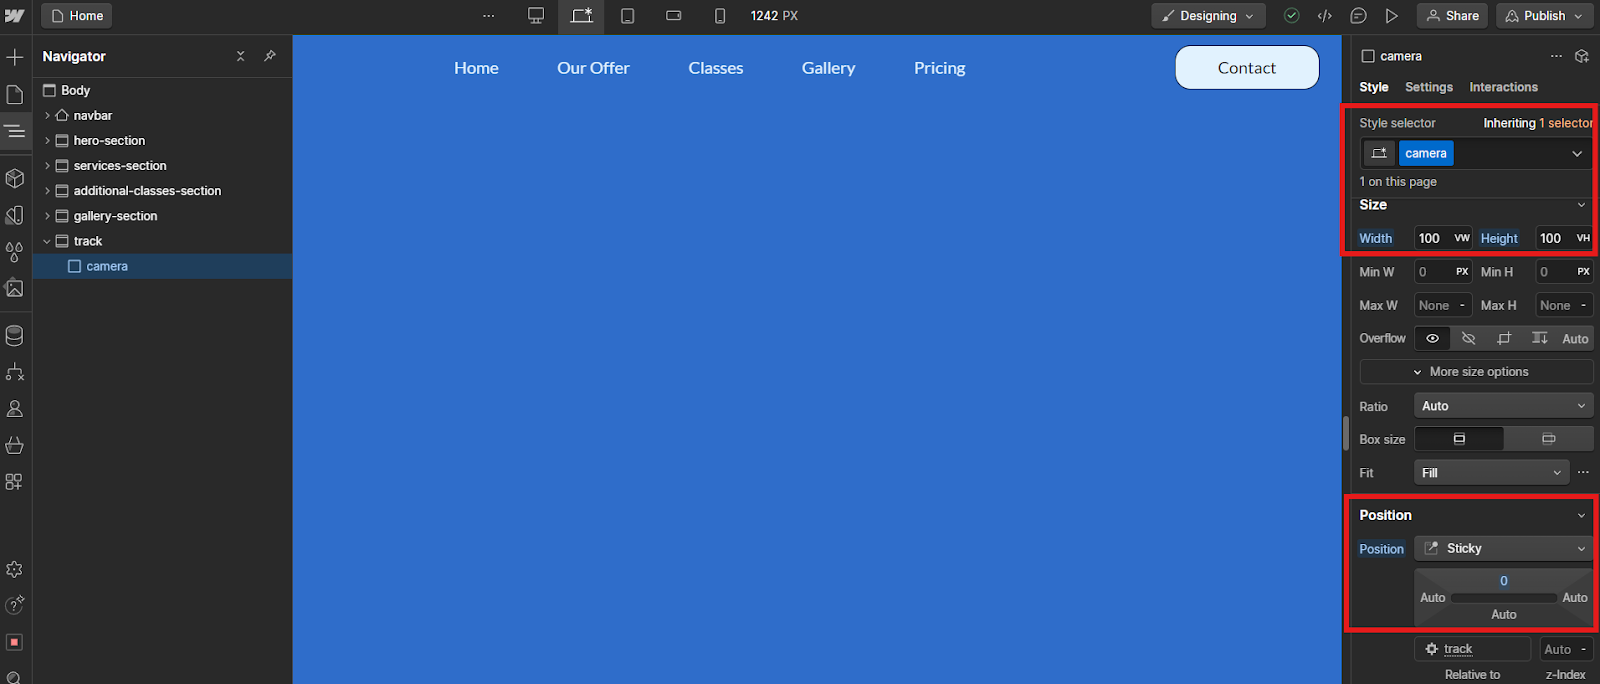
In the next step, we are adding a div block, and we will name it Camera since we will use it as a camera, we are going to see stuff we are scrolling by, it will be our viewport with 100vw and 100vh and over. Now we have VW and VH. Viewport Height (vh) is a way to measure how tall our camera is and 100vh means the whole height of the screen, from top to bottom. We want our Camera to stick to the top in our Track element, which means we need a camera with Position Sticky with 0px top position.
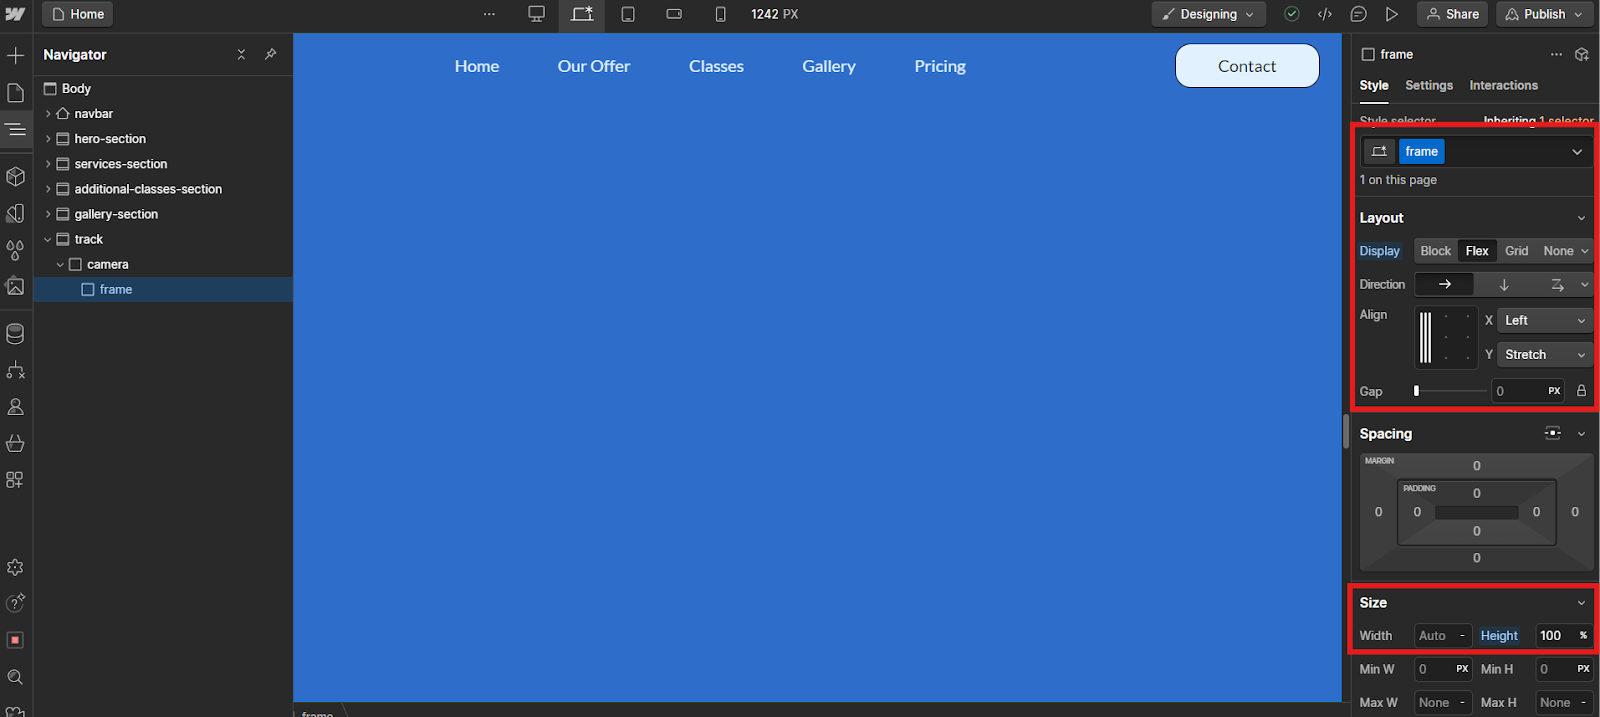
In the next step we will create our frame, we will need another div block this time inside our Camera. We will use the frame in our scrolling interaction to move items, and we want items to align horizontally in our frame. That means we need to set Flexbox, horizontal, and height 100% of our parent element, in this case, Camera is the parent element (we want to fill the entire viewport).
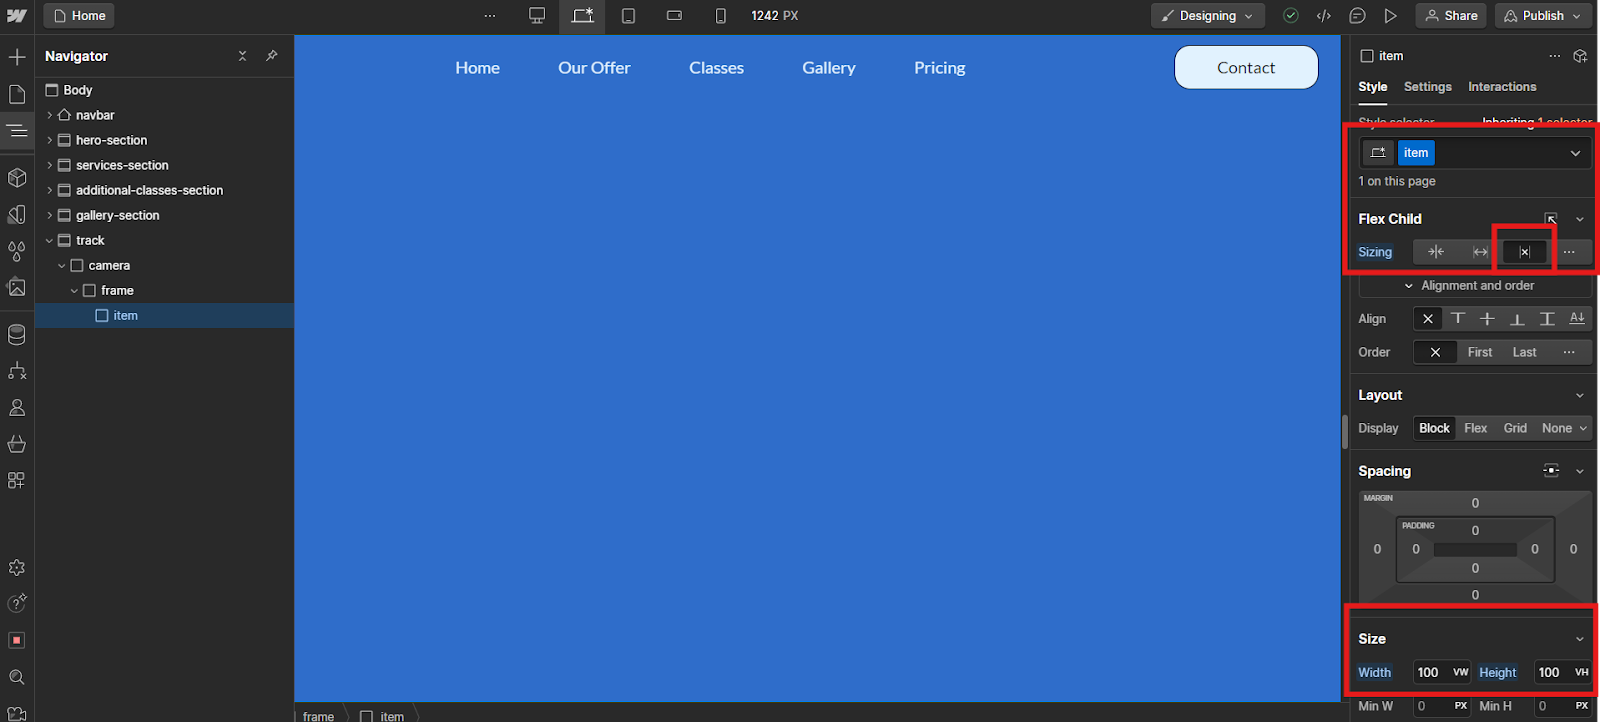
Now, we are adding our Items, div blocks named Items, with Width 100vw, Height 100vh, and in the Sizing we will choose Don’t shrink or grow.
Here, in Items you can put any content, in our example I will use images with the full Width and Height of the Item. I also add some padding just for better visibility. Make sure to add 4 items for this example.

The final step, interaction
After we went through these steps, the final step is to add interaction.
We will add interaction to our Track section, The Element trigger will be While scrolling in view. And, while scrolling in the view we want to Play scroll animation where we will add new animation. While we are at Interaction for our Track section, we will select Frame element and add Move at 10% from 0vw X-axis (10% is because we want our animation to start when we enter the frame, not before that) to -340vw at 100% (we use minus because we want to ensure that we are moving our Frame to the left).
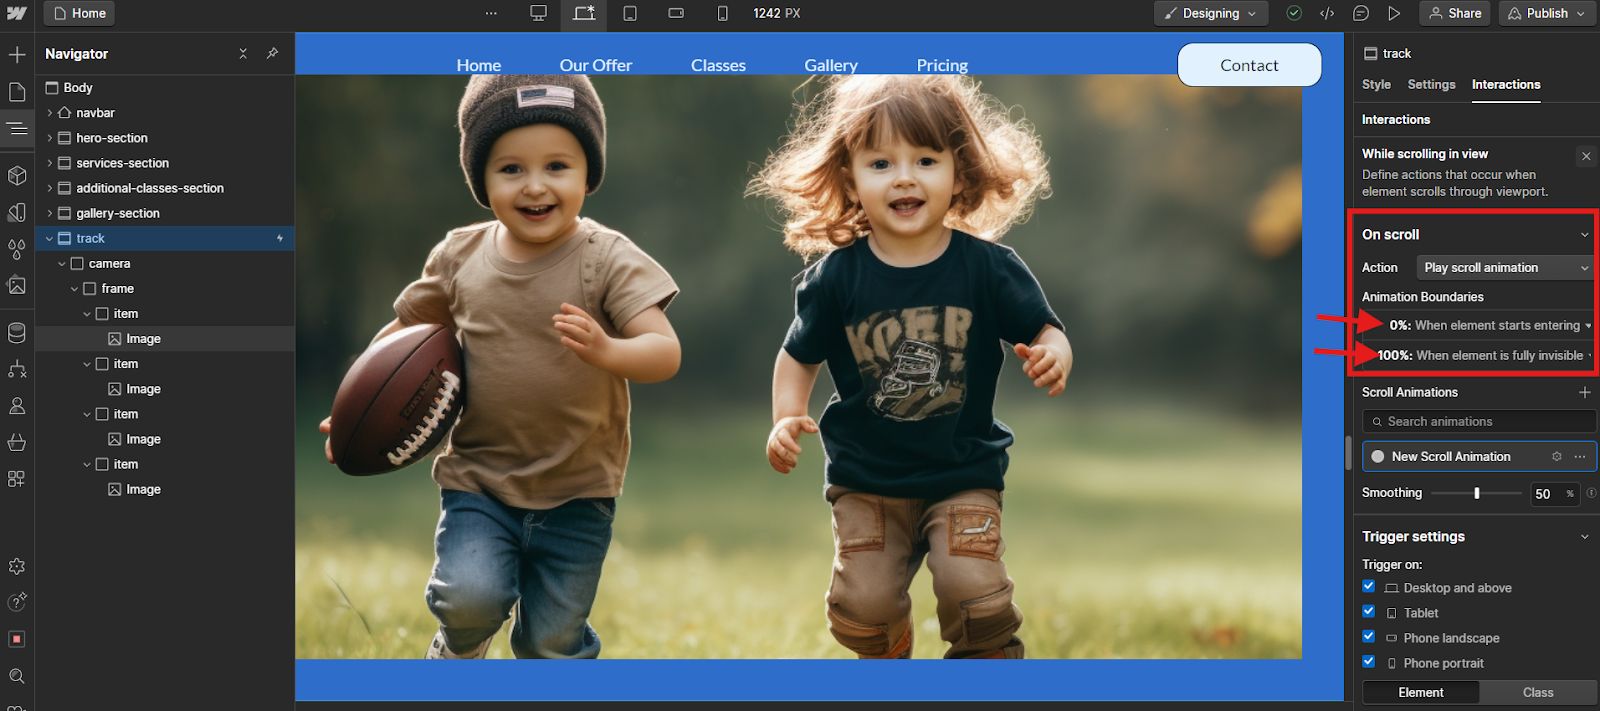
Last, but not least, instead of Move starting at 10%, you can change Animation Boundaries, to make sure the interaction starts when the first Item is fully visible, and finishes when fully invisible by adding an offset of 15% (of course, I encourage you to play with number and percentages).

Conclusion
Horizontal scroll in Webflow allows you to move content side to side, like sliding a big picture, making it ideal for showcasing wide images or creative layouts. This feature is great because it adds a unique, interactive element that will keep users engaged. You just need to add a section and div block with content, and then with simple small Webflow interaction, you will have a nice way to for example present your projects, or products, or any kind of services or products you offer.
.png)
.jpg)
.png)


.png)
.png)