
Webflow is a powerful tool for creating websites without needing to code, and one of its popular elements is the slider. While the Webflow slider is easy to use and provides basic functionality, sometimes advanced options offered by a library like Swiper.js are necessary. In this blog, we will explore how to integrate Swiper.js into Webflow and why you might want to do so.
How to Use Webflow Sliders
The Webflow slider is a basic tool for adding sliding elements to a webpage. You can add it to your page simply by dragging the slider element from the Webflow design tool. Once added, you can customize the slides by adding various elements such as images, text, and buttons.
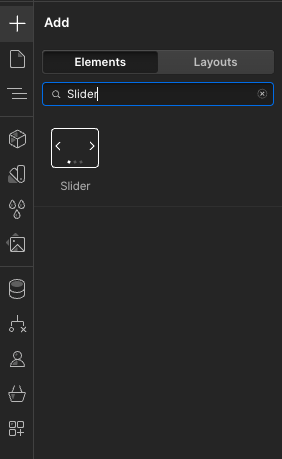
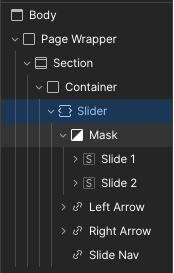
Using Webflow Sliders:
- Simplicity: Add and customize slides without coding.
- Basic Options: Adjust transition speed, autoplay, and navigation buttons.
Disadvantages of Webflow Sliders
While the Webflow slider is easy to use, it has several limitations:
- Limited Functionality: Lacks advanced options like dynamic slide loading, complex animations, or specific navigation control.
- Performance: Can become slow when used with a large number of slides or complex content.
- Customization: Limited options for customizing the design and behavior of the slider.
Advantages of Swiper.js in Webflow
Swiper.js is an advanced library for sliding elements that offers a wide range of functionalities and customization options.
- Advanced Functionality: Support for vertical sliders, dynamic loading, complex animations, and more.
- Performance: Optimized to work with a large number of slides and complex content.
- Customization: Flexibility in the design and behavior of the slider.
- Flexibility: More options for customizing the design and behavior of the slider.
- Advanced Functionality: Ability to implement more complex scenarios that the Webflow slider does not support.
- Better Performance: Optimized for better performance, especially with a large number of slides.
Introduction to Swiper.js Library
Swiper.js is an open-source library for sliding elements, known for its ease of use and rich customization options. It allows the creation of responsive and fluid sliders with minimal coding.
Key Features of Swiper.js:
- Responsiveness: Automatically adjusts to different screen sizes.
- Mobile Support: Supports swipe gestures on mobile devices.
- Rich Customization Options: Customize all aspects of the slider through JavaScript options.
Creating a Basic Swiper in Webflow
To integrate Swiper.js into Webflow, follow these steps:
Add Swiper.js to Webflow:
- Download the Swiper.js libraries from the official website.
- Load the CSS and JS files into your Webflow project via the "Custom Code" option.
Step 1:
Place this code inside the <head> tag on the page where you have the swiper:
<!-- Link Swiper's CSS -->
<link rel="stylesheet" href="https://unpkg.com/swiper@8/swiper-bundle.min.css"/>
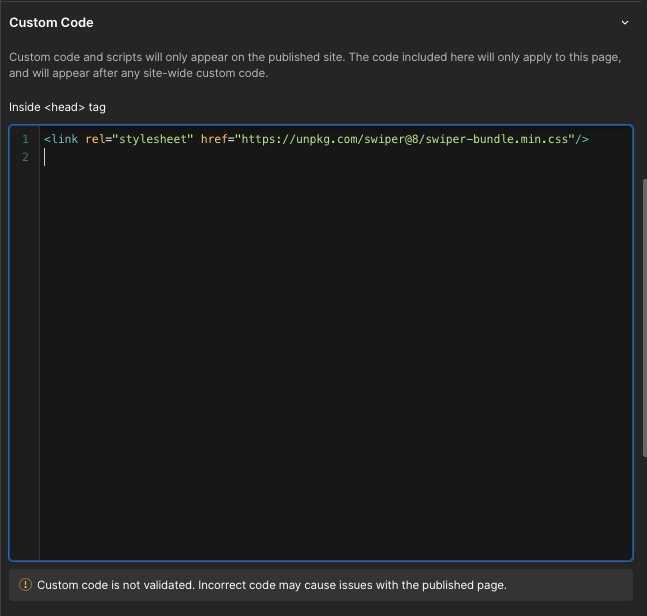
Step 2:
Place this code before the <body> tag on the page where you have the swiper:
<!-- Swiper JS -->
<script src="https://cdn.jsdelivr.net/npm/swiper@8/swiper-bundle.min.js"></script>
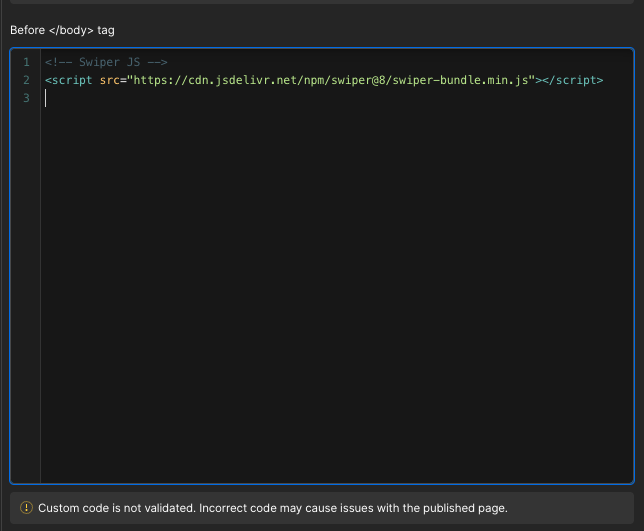
Note:
In the Swiper JS documentation, they say you should always use the latest version, which is currently version 11.
Initialize Swiper:
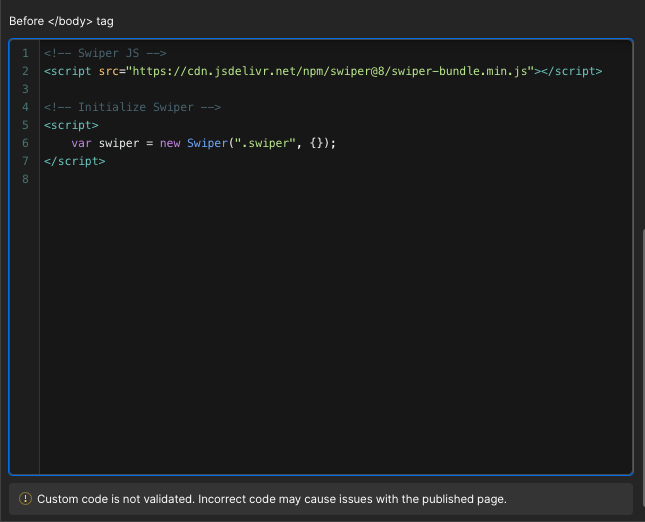
Use Webflow's custom code editor to initialize Swiper with basic options.
Here is an example of how the custom code for a simple Swiper initialization should look in Webflow:
Note:
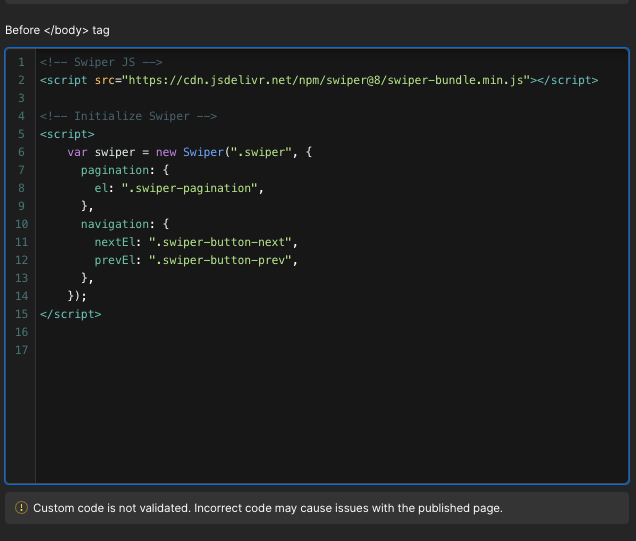
Here is an example of the custom code for a simple Swiper initialization with navigation and pagination in Webflow:
Create the HTML Structure:
- Add the appropriate HTML structure for Swiper within Webflow.
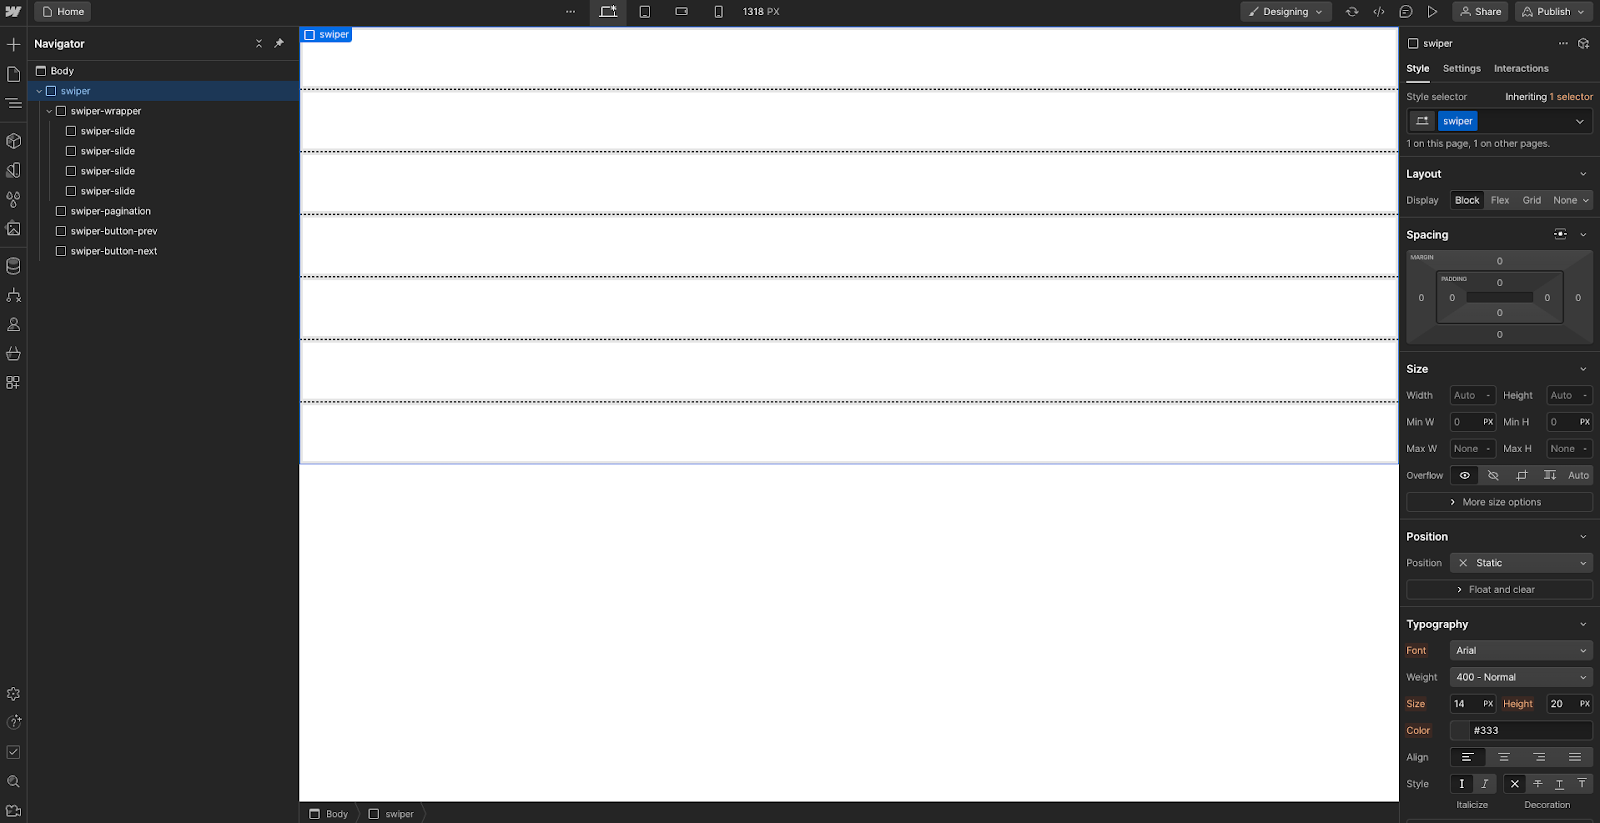
Here is an example of the correct Swiper structure in Webflow:
Note:
Here is an example of how the HTML structure should look.
<!-- HTML Structure --> <div class="swiper"> <div class="swiper-wrapper"> <div class="swiper-slide">Slide 1</div> <div class="swiper-slide">Slide 2</div> <div class="swiper-slide">Slide 3</div> </div> <!-- Add Pagination --> <div class="swiper-pagination"></div> <!-- Add Navigation --> <div class="swiper-button-next"></div> <div class="swiper-button-prev"></div> </div>
Step 1:
As you can see, the first div has the class swiper, and it’s the parent div. Every other part of the Swiper structure is inside this div.
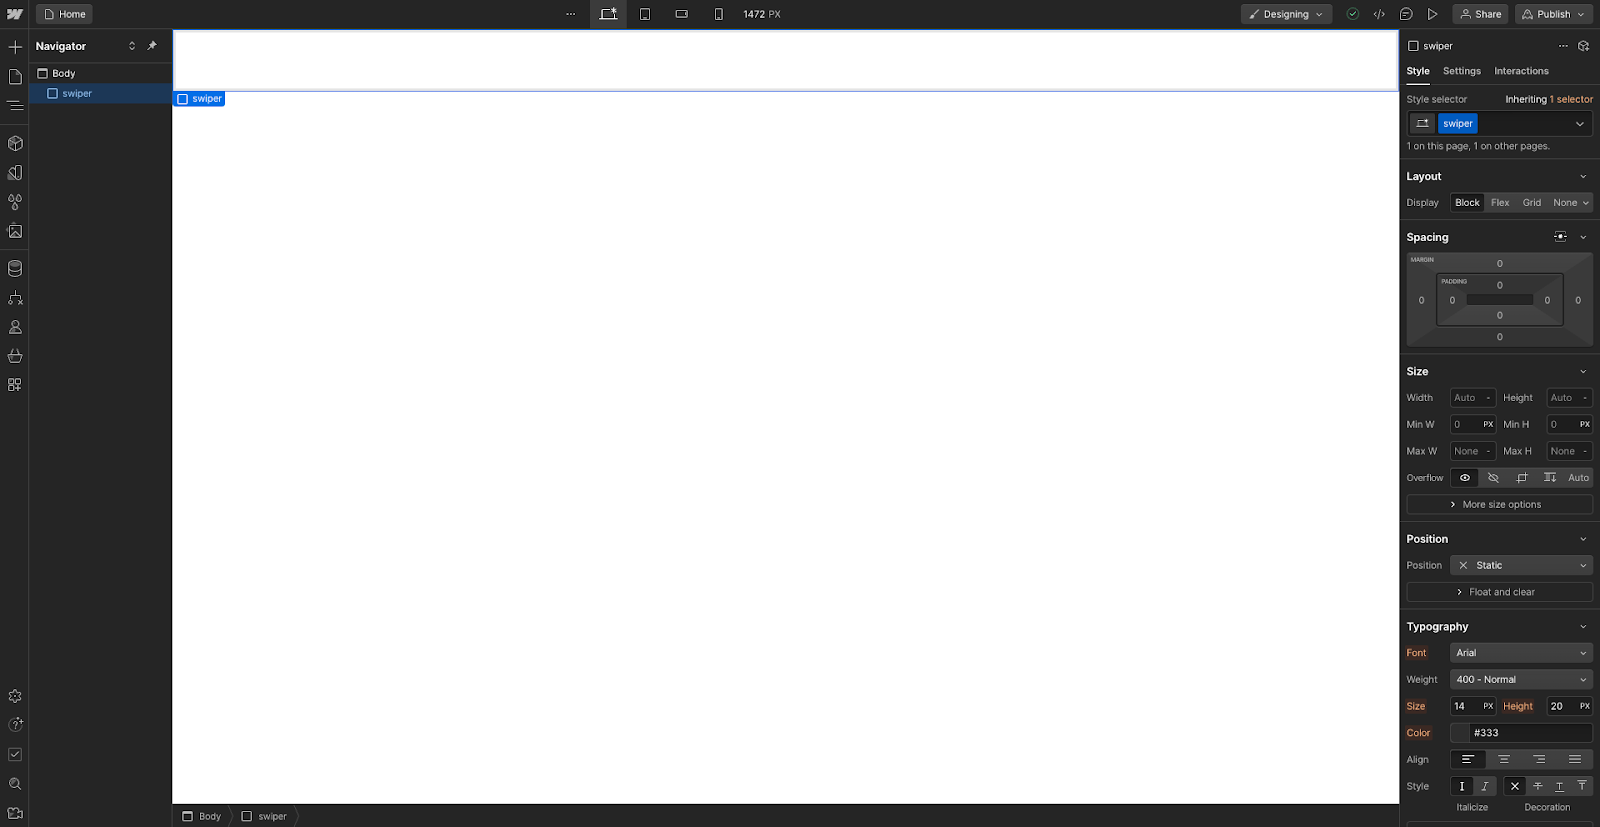
You can give this div another name like swiper1, but you need to initialize that exact class in the specific script. Very important: if you have more than one swiper on the same page, it is not good to use the same class. so, for the other initialization of swiper, you need to use the exact class.
See an example of how it looks in the page settings:
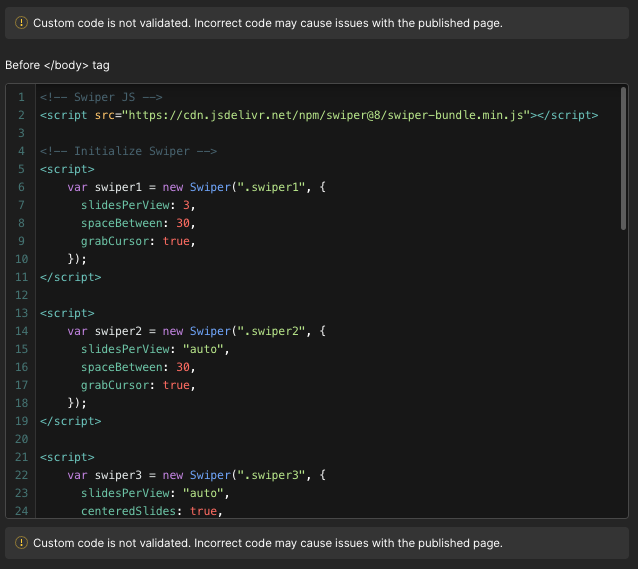
See how it looks in Webflow:

Step 2:
Inside the div with the swiper class, you need to put another div with the class name swiper-wrapper.

Note: This must always be a div with the exact class swiper-wrapper!
Step 3:
Inside the div with the swiper-wrapper class, you need to put another div with the class swiper-slide. After creating one div with the swiper-slide class, you can copy that div and paste it as many times as your Swiper needs slides. In my example, I have only 3 divs with the swiper-slide class.
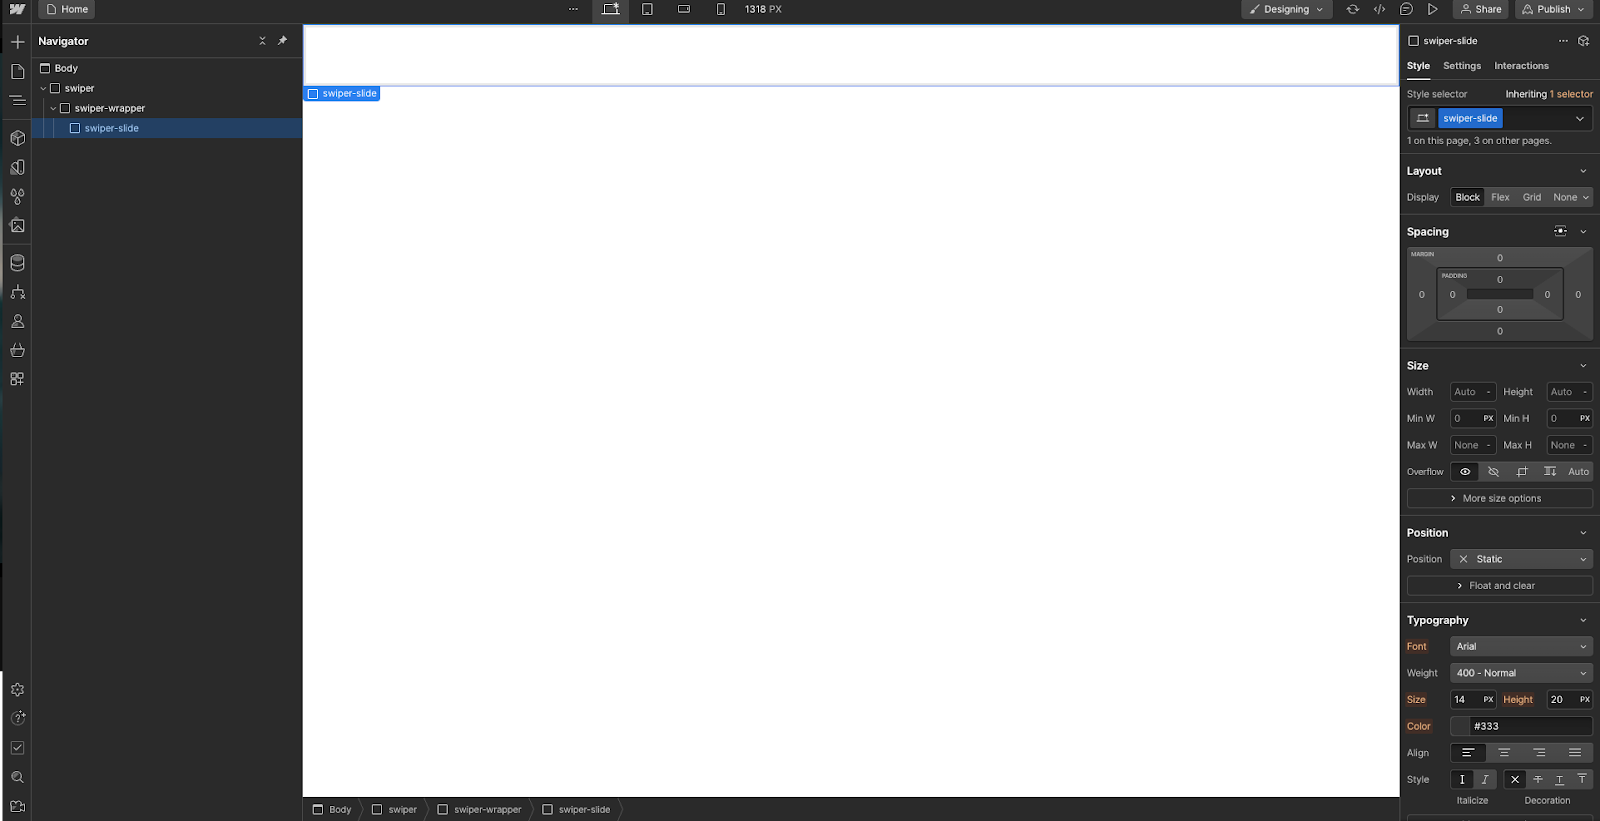
Note: This must always be a div with the exact class swiper-slide!
Optional Step:
If you want to have pagination in your Swiper, you need to add the div that will initialize pagination in your Swiper. According to the Swiper.js library, they give that div the class swiper-pagination. You can change this and give it your own class, but be aware that you need to initialize that exact class in the Swiper.js script, which must be located in the page settings where you want to initialize the Swiper. In my case, you can see how I used the default class from the documentation, which is swiper-pagination.
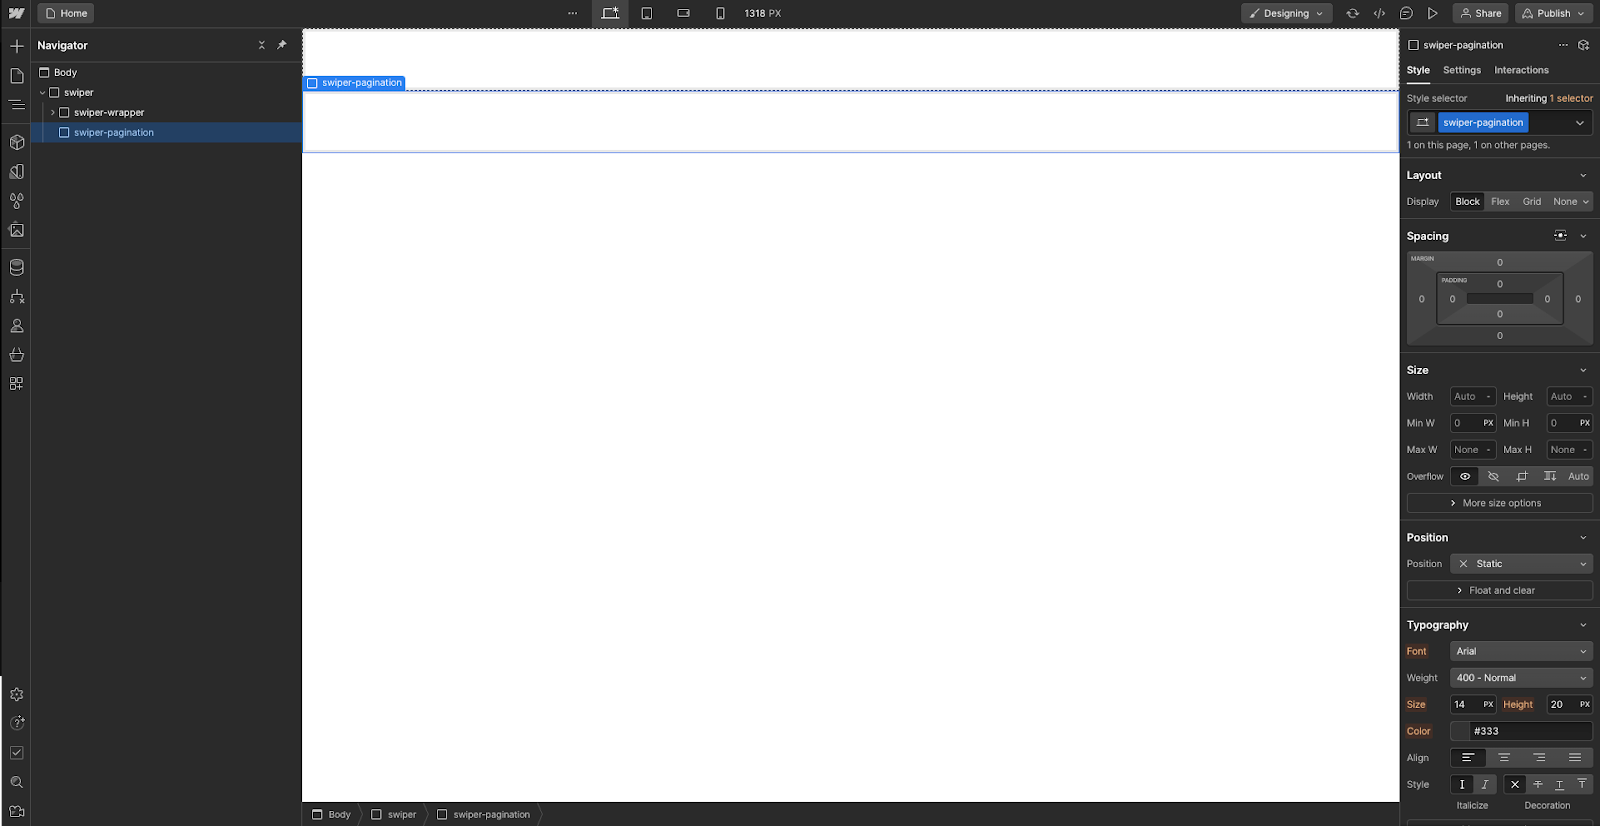
IMPORTANT PART!!!
By adding CSS from the Swiper.js library (<link rel="stylesheet" href="https://unpkg.com/swiper@8/swiper-bundle.min.css"/>), certain elements will already have their style. You can, of course, override this by writing custom CSS for the element you want to style specifically, or you can try adding a subclass and styling it to your liking in Webflow. It is important to know that you can style most things through Webflow, but for some, you will need custom CSS (depending on what you are creating).
Optional Step:
If you want to have navigation arrows in your Swiper, you also need to add two more divs: one with the class swiper-button-prev, which will indicate the arrow that returns to the previous slide, and another div with the class swiper-button-next, which will indicate the arrow that leads to the next slide. It is very important to note that you do not have to strictly adhere to these classes for arrows or pagination, but the class must match in the script where you initialized Swiper. You can see my example below:
divs (Swiper navigation arrows) in Webflow:
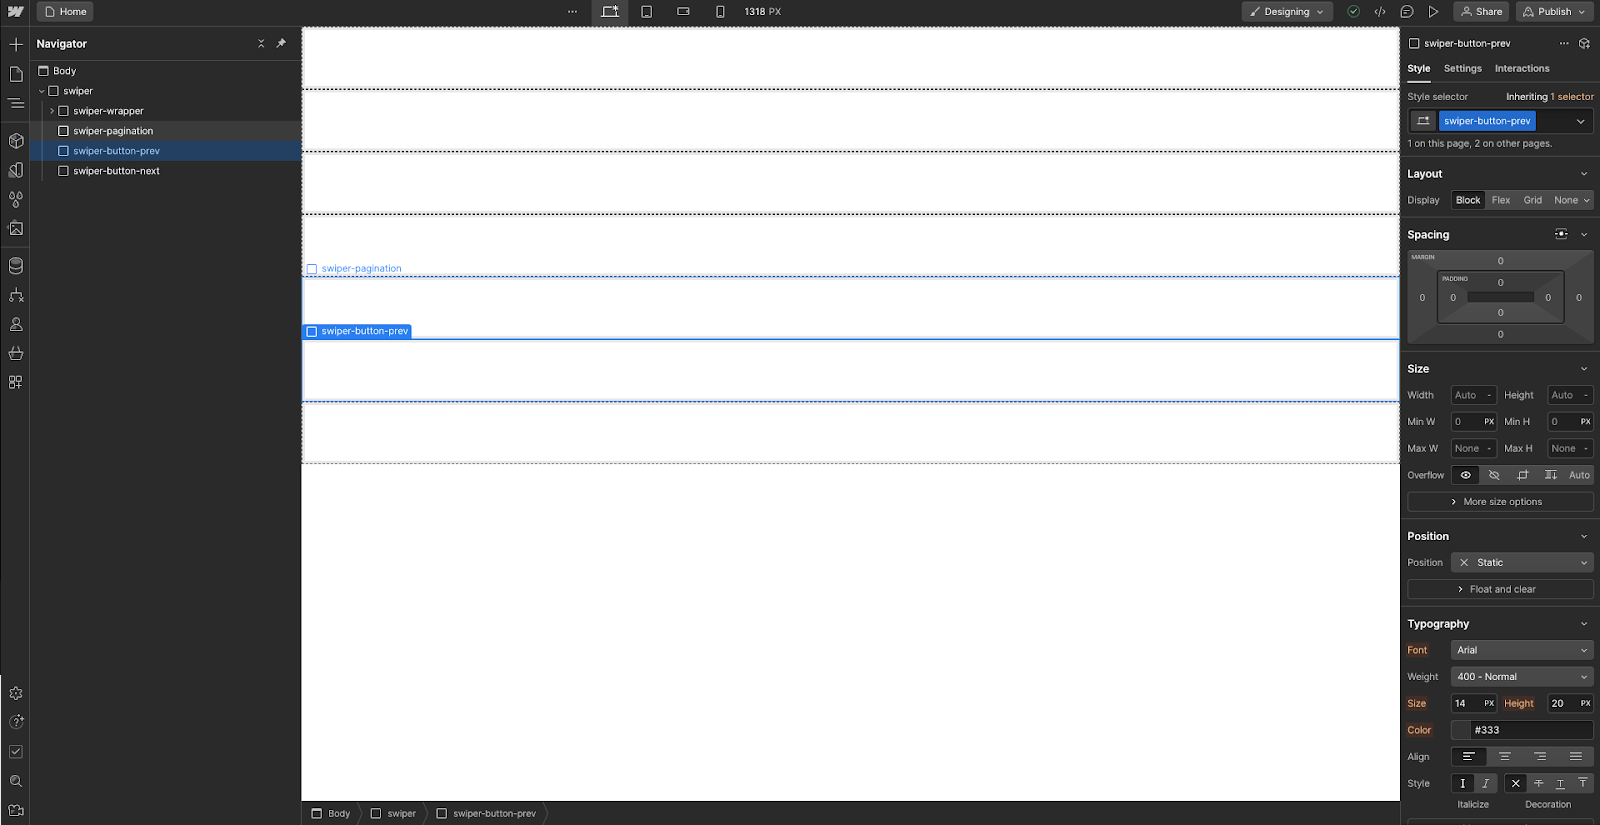
Initialization of those divs, i.e., the exact classes in the script for that specific Swiper:

Advanced Functionality in Swiper
Swiper.js offers a comprehensive suite of advanced functionalities that you can leverage to create highly dynamic and interactive sliders:
- Lazy Loading: Load images and content only when needed, improving performance and initial load times.
- Autoplay: Automatically cycle through slides with customizable delay settings and interaction control.
- Nested Swipers: Create complex structures with nested Swipers, allowing for multiple sliders within one another.
- Parallax Effects: Add dynamic parallax effects for a more visually engaging design.
- Virtual Slides: Efficiently handle a large number of slides by rendering only the visible ones.
- Responsive Breakpoints: Adjust slider settings and layout based on different screen sizes and breakpoints.
- Dynamic Slides: Add, remove, or update slides dynamically without reinitializing the slider.
- Multiple Slides Per View: Display multiple slides simultaneously within the viewport.
- Effect Variations: Use various transition effects such as fade, cube, coverflow, and flip for unique slide animations.
- Free Mode: Enable a free-scroll mode without snapping to slides.
- Grid Layout: Arrange slides in a grid layout with rows and columns.
- Loop Mode: Create an infinite loop of slides for continuous scrolling.
- Thumbnails: Use thumbnail navigation to control the main slider.
- Hash Navigation: Enable navigation using hash URLs for deep linking.
- History Navigation: Integrate with browser history for navigation through the slider.
- Controller: Control multiple Swipers together with one acting as the master controller.
- Mousewheel Control: Allow users to navigate slides using the mouse wheel.
- Keyboard Control: Enable keyboard navigation with customizable key mappings.
- Scrollbar: Add a draggable scrollbar for slider navigation.
- Pagination: Utilize various pagination types such as bullets, fraction, and progress bars.
- Zoom: Add zoom functionality for images within slides.
- Accessibility: Enhance accessibility with ARIA attributes and keyboard navigation.
- Autoplay Control: Fine-tune autoplay behavior with pause on interaction and reverse direction options.
- Swipe Handler: Customize swipe handling for various interaction modes.
- Breakpoints: Configure responsive breakpoints to adapt slider settings for different screen sizes.
- Customizable Navigation Buttons: Personalize the appearance and functionality of navigation buttons.
- Effect Flip: Implement a 3D flip effect for slide transitions.
- Effect Coverflow: Create a cover flow effect with perspective and shadow.
- Effect Cards: Add a stacking card effect for slide transitions.
- Effect Creative: Utilize a highly customizable effect with multiple stages and custom transforms.
Note:
These features make Swiper.js an incredibly powerful and flexible tool for implementing sliders with complex functionality and high performance.
You can see swiper examples in action here.
More Examples of Swiper.js
You can use Swiper.js in various scenarios:
- Image Galleries: Create interactive galleries with swipe functionality.
- Product Displays: Showcase products with advanced filtering and sorting capabilities.
- Testimonials: Display client testimonials with styled transitions.
Note:
Explore some of the examples here.
Help and Tips for developers
I have created several Swiper.js examples in Webflow, ranging from simple implementations to more complex setups. These examples are designed to help developers easily integrate Swiper.js into their projects, no matter their level of expertise. By providing these ready-made examples, I aim to simplify the process of adding advanced sliders to your Webflow sites, ensuring a smooth and efficient implementation.
Note: This approach reflects my preferred workflow, which combines custom code with CSS within Webflow. I opt to add subclasses to the Swiper structure directly, allowing for easier styling within Webflow without extensive custom code. While Swiper.js offers a wide range of functionalities, some customization may require additional custom code. Therefore, I recommend thoroughly reviewing the Swiper.js documentation for a deeper understanding of its capabilities and implementation nuances.
Conclusion
The Webflow slider is great for basic needs, but Swiper.js offers significant advantages when advanced functionalities and customization are required. By integrating Swiper.js into Webflow, you can take advantage of the best of both worlds – the ease of use of Webflow and the powerful features of the Swiper.js library. Depending on your needs, combining these two tools can greatly enhance the functionality and appearance of your website.

.png)


.svg)

.png)


.png)
.png)