


.svg)
What is domain?
A domain name is a unique, easy-to-remember address used to access websites. It’s the website’s equivalent to a physical address. For example, ‘google.com’ and ‘facebook.com’ are domain names.
Domain names are key to the internet infrastructure as they help users easily find your website and eliminate the need to memorize the site’s Internet Protocol (IP) address. They consist of a name and an extension.
In the context of the internet, a domain name identifies a realm of administrative autonomy, authority, or control. They are often used to identify services provided through the Internet, such as websites, email services, and more.
It’s important to note that having a domain name doesn’t necessarily mean you have a website. You would still need a web hosting service to make your website accessible on the internet. This is where web hosting comes into play.
What is web hosting?
Web hosting is the process of renting or buying space on the internet to store and make your website accessible. It’s a service provided by various companies that allows you to publish your website online.
There are different types of web hosting services, including:
- Shared Hosting: In this type, your website is hosted on the same server as many other sites. It’s a cost-effective option, but it may have limitations in terms of performance and scalability.
- Dedicated Hosting: This type provides you with a server all to yourself. It offers more control and better performance, but it’s more expensive.
- Virtual Private Server (VPS) Hosting: This is a middle-ground option between shared and dedicated hosting. It involves sharing a server with other websites, but with a limited number, allowing for better performance and more control.
- Reseller Hosting: This allows you to become a web host yourself.
- Webflow’s hosting doesn’t fall into the traditional categories of Shared Hosting, Dedicated Hosting, or Virtual Private Server (VPS) Hosting. Instead, it’s a form of cloud-based managed hosting. It’s powered by Amazon Web Services & Fastly, providing a global infrastructure supporting millions of sites. It offers features like global CDN, HTTP/2 standard and HTTP/3 support, SSL/TLS, Global DDoS & WAF protection, and automatic form filtering. It’s designed to be reliable, scalable, fast, and secure.
Domain is like the building we live in, and hosting is the rent we pay!
Is it free to set a custom domain in Webflow?
Setting a custom domain in Webflow is not free. You need to subscribe to one of their paid plans to connect a custom domain to your site. The Basic plan, which allows you to connect a custom domain, starts at $14 per month if billed annually, or $18 per month if billed monthly.
Domain platforms
Web domain platforms, also known as domain registrars, are services that let you register and purchase domain names. Domain names are the web addresses that you type into your browser to visit websites.
Here are some of the best domain registrars:
1. GoDaddy is a comprehensive platform that offers a variety of services to help individuals and businesses establish their online presence.
Here are some key details about GoDaddy:
- Domain Registration: GoDaddy is a domain registrar, allowing you to search and register available domain names.
- Web Hosting: As of 2023, GoDaddy is the world’s fifth largest web host by market share, providing reliable hosting services for over 62 million registered domains.
- Website Builder: GoDaddy offers a beginner-friendly website builder, making it perfect for beginners who need simplicity and a low barrier to entry.
- GoDaddy Corporate Domains: GoDaddy Corporate Domains (GCD) uses the latest technology to deliver secure, intuitive and powerful domain management solutions for enterprise-level domain name portfolios.
- Online Marketing Tools: GoDaddy provides online marketing tools to help businesses grow online.
- Customer Support: GoDaddy offers award-winning 24/7 customer support and is one of the few web hosts that now offer SMS support.
2. Web.com is a well-known platform that offers a variety of services including domain registration, web hosting, and digital marketing solutions. It is designed to help businesses establish their online presence and reach their goals.
Here are some key details about Web.com:
- Domain Registration: Web.com provides a domain name search feature that allows you to find and register your domain. It offers a wide range of domain extensions to choose from.
- Domain Management: Once you’ve registered a domain with Web.com, you can manage various aspects of your domain from the Domain Details page. This includes editing auto-renew settings, managing transfer lock, purchasing private registration, changing where your domain points, connecting web services to your domain, and managing DNS and host records.
- Website Setup: Web.com also provides tools to set up your website. If you haven’t yet assigned your domain name to your website, you can do so through the Account Manager.
- Domain Privacy: Web.com offers Domain Privacy, which masks your personal information on the WHOIS database, protecting you from spam mail, unwanted phone calls, and solicitations.
- Additional Services: In addition to domain registration, Web.com offers a variety of other services including web hosting, website design, and digital marketing solutions.
3. DNSimple is a domain registration and management platform that offers a variety of services.
Here are some key details about DNSimple:
- Domain Management: DNSimple provides simple domain management whether you own one domain or 100,000. It simplifies registration, transfer, and renewal.
- Domain Registration: DNSimple offers secure domain registration for hundreds of top-level domains with fewer steps and sensible defaults.
- Zero-Downtime Domain Transfers: DNSimple ensures your domains remain accessible to your customers throughout every transfer.
- Auto-Renewal: You can opt into auto-renewal to renew your domains automatically within 30 days of expiration.
- Additional Tools: DNSimple provides tools most domain registrars don’t, including DDoS defense, free WHOIS privacy, DNSSEC security, and one-click integrations.
- Domain Control Plane: The Domain Control Plane works by connecting DNSimple via secure APIs to services where your domains and DNS are, then displaying your domains at other providers alongside your DNSimple domains inside DNSimple.
- SSL Certificates: DNSimple offers SSL certificates with DNS-based domain validation, auto-renewal, and Wildcard support.
- API Access: DNSimple provides full API access with well-documented, battle-tested libraries for you to work with.
4. Domain.com is a comprehensive platform that offers a variety of services to help individuals and businesses establish their online presence.
Here are some key features and services provided by Domain.com:
- Domain Registration: Domain.com allows you to search hundreds of available domain names and register the perfect domain for your business.
- WHOIS Lookup: This feature allows you to see who owns specific domains and check their availability. The WHOIS Lookup results reveal the owner or manager of a domain name, including their contact information such as name, phone number, and address.
- Domain Transfer: You can transfer a domain to Domain.com and receive a free year of registration.
- Google Workspace: Domain.com offers Google Workspace, which allows you to create a branded email address and easily collaborate on the cloud.
- Domain Privacy + Protection: Although ICANN requires Domain.com to provide private information for their public WHOIS database, Domain.com’s Domain Privacy + Protection service masks your private contact details by displaying their information instead of yours.
- Hosting Services: Domain.com provides reliable hosting services, designed for all user types. Whether you’re just starting your online presence or already managing a fleet of websites, Domain.com provides you with the tools and controls you need to build, manage, and secure a powerful presence.
5. Domains Made Easy is a domain registration and management platform that offers a variety of services.
Here are some key details about Domains Made Easy:
- Domain Registration: Domains Made Easy provides a domain name search feature that allows you to find and register your domain. It offers a wide range of domain extensions to choose from.
- Domain Forwarding and Masking: This feature allows you to direct any domain name you own to your website. Anyone who types that domain name into their browser is taken directly to your website.
- Domain Locking: This feature prevents accidental or intentional transfers of domain ownership and stops anyone from redirecting your nameservers.
- Total DNS Control: You can manage your domain nameserver (DNS) records and set your email, FTP, sub-domains, and website location all from one control panel.
- Change of Registration: You can assign your domain name to someone else or change the contacts for your domain online anytime.
- Status Alerts: This feature allows you to monitor the status of your domain and get instant alerts if there’s been a change.
- Auto Renew Protection: No need to watch expiration dates to make sure you renew on time! Auto renew keeps your domains, hosting, website builders, and other products in your name and under your control.
6. Namecheap is a domain registration and web hosting company founded in 2000. It offers a variety of services to help customers build their online presence.
Here are some key details about Namecheap:
- Domain Registration: Namecheap supports over 1,500 domain name extensions, which is a remarkable number for any domain registrar. You can search for any domain name on the platform and buy it right away if it’s available. Namecheap also lets you perform bulk domain name searches (up to 5,000 at a time).
- Hosting Plans: Namecheap’s hosting plans include free automatic SSL installation, a free website builder, domain name and privacy protection, and unmetered bandwidth.
- Customer Base: The company is a leading ICANN Accredited Domain Registrar, with over 2 million customers and over 16 million domains worldwide.
- Marketplace Platform: Developed by the technology team at Namecheap, the platform allows professionals to quickly search, find, and purchase high-value domain names via in-house auctions or ‘Buy it now’ listings.
- Pricing: Introductory rates start as low as $1.58 per month for the first year.
- Customer Support: Namecheap offers 24/7 live support. However, it does not offer phone support.
7. Bluehost is a domain registration and web hosting company that offers a variety of services.
Here are some key details about Bluehost:
- Domain Registration: Bluehost supports over 1,500 domain name extensions, which is a remarkable number for any domain registrar. You can search for any domain name on the platform and buy it right away if it’s available. Bluehost also lets you perform bulk domain name searches (up to 5,000 at a time).
- Hosting Plans: Bluehost’s hosting plans include free automatic SSL installation, a free website builder, domain name and privacy protection, and unmetered bandwidth.
- Customer Base: The company is a leading ICANN Accredited Domain Registrar, with over 2 million customers and over 16 million domains worldwide.
- Marketplace Platform: Developed by the technology team at Bluehost, the platform allows professionals to quickly search, find, and purchase high-value domain names via in-house auctions or ‘Buy it now’ listings.
- Pricing: Introductory rates start as low as $1.58 per month for the first year.
- Customer Support: Bluehost offers 24/7 live support. However, it does not offer phone support.
8. iONOS is a domain registration and web hosting company that offers a variety of services.
Here are some key details about iONOS:
- Domain Registration: iONOS supports a wide range of domain name extensions. You can search for any domain name on the platform and buy it right away if it’s available. iONOS also lets you perform bulk domain name searches.
- Hosting Plans: iONOS offers a variety of hosting plans, including ASP.NET Hosting, VPS Hosting, and WordPress Hosting. These plans come with features like SSL certificates and privacy protection.
- Cloud DNS: iONOS Cloud DNS lets you publish Domain Name System (DNS) zones of your domains and subdomains on public Name Servers. You can manage your DNS zones and records via the Cloud DNS API.
- Customer Support: iONOS offers a variety of support options, including a comprehensive digital guide that provides information about internet addresses and their components.
- Pricing: iONOS is known for its affordable pricing. Its domain names cost as low as $10 in the first year. The pricing is straightforward, and iONOS also provides free add-ons like SSL certificates and privacy protection.
9. Cloudflare is a domain registration and management platform that offers a variety of services.
Here are some key details about Cloudflare:
- Domain Registration: Cloudflare Registrar is a service for registering domain names that doesn’t mark up the price for doing so. It offers essentially the same services as other domain name registrars but without markups, without increased renewal fees, and with some additional security features.
- Hosting Plans: Cloudflare offers a variety of hosting plans, including security, performance, and reliability in one package. These plans come with features like DNSSEC and two-factor authentication, also for free.
- Customer Support: Cloudflare offers a variety of support options, including a comprehensive digital guide that provides information about internet addresses and their components.
- Pricing: Cloudflare is known for its affordable pricing. Its domain names cost as low as $10 in the first year. The pricing is straightforward, and Cloudflare also provides free add-ons like SSL certificates and privacy protection.
- Security: Cloudflare is primarily an internet security company. By switching to using their Name Servers and DNS, they become a shield (a proxy) between your domain name (not your server) and the rest of the world.
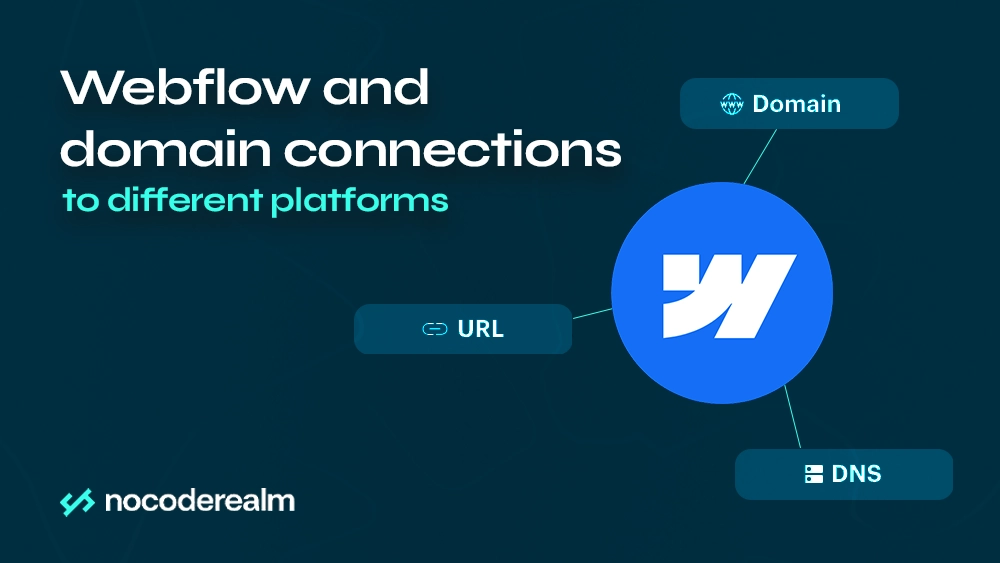
Connecting Webflow website to different Webflow platforms:
Connecting a custom domain with GoDaddy:
Part 1: Webflow Setup
- Add your custom domain:
- Go to your Webflow dashboard and select the project you want to connect to your custom domain.
- Click on Project Settings in the top right corner.
- In the settings menu, click on the Hosting tab.
- Under the Custom Domains section, enter your custom domain in the input field and click Add.
- Enable SSL:
- Still in the Hosting tab, you’ll see an SSL section.
- Make sure the toggle next to SSL is turned on. SSL (Secure Sockets Layer) is a security protocol that creates an encrypted link between a web server and a browser, ensuring that all data passed between them remains private.
- Save DNS settings:
- After adding your domain, Webflow will provide you with two records: an @ record and a CNAME record.
- The @ record should point to an IP address provided by Webflow.
- The CNAME record should point to proxy-ssl.webflow.com.
- Make sure to save these records for the next part.
Part 2: GoDaddy Setup
- Access DNS settings:
- Log in to your GoDaddy account.
- Click on your username in the top right corner and select Manage Domains from the dropdown menu.
- Click on the domain you want to connect to your Webflow site.
- On the domain page, click on the DNS button.
- Delete existing records:
- In the Records section, look for any existing @ or CNAME records.
- If there are any records pointing to another service (like a different website builder), click on the pencil icon to edit the record, then click on the trash can icon to delete it.
- Add @ record:
- Click Add at the bottom of the Records section.
- Select A from the Type dropdown menu.
- Enter @ in the Host field.
- Paste the IP address provided by Webflow in the Points to field.
- Leave the TTL field as it is, usually it’s set to 1 hour by default.
- Add CNAME record:
- Click Add again to add another record.
- Select CNAME from the Type dropdown menu.
- Enter www in the Host field.
- Paste proxy-ssl.webflow.com in the Points to field.
- Save changes:
- Click Save to apply the changes.
Part 3: Final Steps
- Verify connection:
- Go back to your Webflow project settings.
- In the Hosting tab, click the Check status button next to your custom domain.
- If everything is set up correctly, your domain will be connected and you’ll see a green checkmark next to it.
- Publish your site:
- In your Webflow dashboard, click on the Publish button in the top right corner.
- Select your custom domain and click Publish again.
Connecting a custom domain with Web.com:
Part 1: Webflow Setup
- Add your custom domain:
- Go to your Webflow dashboard and select the project you want to connect to your custom domain.
- Click on Project Settings in the top right corner.
- In the settings menu, click on the Hosting tab.
- Under the Custom Domains section, enter your custom domain in the input field and click Add.
- Enable SSL:
- Still in the Hosting tab, you’ll see an SSL section.
- Make sure the toggle next to SSL is turned on. SSL (Secure Sockets Layer) is a security protocol that creates an encrypted link between a web server and a browser, ensuring that all data passed between them remains private.
- Save DNS settings:
- After adding your domain, Webflow will provide you with two records: an @ record and a CNAME record.
- The @ record should point to an IP address provided by Webflow.
- The CNAME record should point to proxy-ssl.webflow.com.
- Make sure to save these records for the next part.
Part 2: Web.com Setup
- Access DNS settings:
- Log in to your Web.com account.
- Click on Domains in the main menu.
- Click on Manage DNS next to the domain you want to connect.
- Delete existing records:
- In the DNS Records section, look for any existing @ or CNAME records.
- If there are any records pointing to another service (like a different website builder), click on the Edit button next to the record, then click on Delete Record.
- Add @ record:
- Click Add Record.
- Select A from the Type dropdown menu.
- Enter @ in the Host field.
- Paste the IP address provided by Webflow in the Points to field.
- Leave the TTL field as it is, usually it’s set to 1 hour by default.
- Add CNAME record:
- Click Add Record again to add another record.
- Select CNAME from the Type dropdown menu.
- Enter www in the Host field.
- Paste proxy-ssl.webflow.com in the Points to field.
- Save changes:
- Click Save Changes to apply the changes.
Part 3: Final Steps
- Verify connection:
- Go back to your Webflow project settings.
- In the Hosting tab, click the Check status button next to your custom domain.
- If everything is set up correctly, your domain will be connected and you’ll see a green checkmark next to it.
- Publish your site:
- In your Webflow dashboard, click on the Publish button in the top right corner.
- Select your custom domain and click Publish again.
Connecting a custom domain with DNSimple:
Part 1: Webflow Setup
- Add your custom domain:
- Go to your Webflow dashboard and select the project you want to connect to your custom domain.
- Click on Project Settings in the top right corner.
- In the settings menu, click on the Hosting tab.
- Under the Custom Domains section, enter your custom domain in the input field and click Add.
- Enable SSL:
- Still in the Hosting tab, you’ll see an SSL section.
- Make sure the toggle next to SSL is turned on. SSL (Secure Sockets Layer) is a security protocol that creates an encrypted link between a web server and a browser, ensuring that all data passed between them remains private.
- Save DNS settings:
- After adding your domain, Webflow will provide you with two records: an @ record and a CNAME record.
- The @ record should point to an IP address provided by Webflow.
- The CNAME record should point to proxy-ssl.webflow.com.
- Make sure to save these records for the next part.
Part 2: Domain.com Setup
- Access DNS settings:
- Log in to your Domain.com account.
- Click on Domains in the main menu and select My Domains.
- Click on the domain you want to connect to your Webflow site.
- On the domain page, click on DNS Records.
- Delete existing records:
- In the DNS Records section, look for any existing @ or CNAME records.
- If there are any records pointing to another service (like a different website builder), click on the Delete button next to the record.
- Add @ record:
- Click Add DNS Record.
- Select A from the Record Type dropdown menu.
- Enter @ in the Host field.
- Paste the IP address provided by Webflow in the Points To field.
- Leave the TTL field as it is, usually it’s set to 1 hour by default.
- Add CNAME record:
- Click Add DNS Record again to add another record.
- Select CNAME from the Record Type dropdown menu.
- Enter www in the Host field.
- Paste proxy-ssl.webflow.com in the Points To field.
- Save changes:
- Click Add Record to apply the changes.
Part 3: Final Steps
- Verify connection:
- Go back to your Webflow project settings.
- In the Hosting tab, click the Check status button next to your custom domain.
- If everything is set up correctly, your domain will be connected and you’ll see a green checkmark next to it.
- Publish your site:
- In your Webflow dashboard, click on the Publish button in the top right corner.
- Select your custom domain and click Publish again.
Connecting a custom domain with Domains.com:
Part 1: Webflow Setup
- Add your custom domain:
- Go to your Webflow dashboard and select the project you want to connect to your custom domain.
- Click on Project Settings in the top right corner.
- In the settings menu, click on the Hosting tab.
- Under the Custom Domains section, enter your custom domain in the input field and click Add.
- Enable SSL:
- Still in the Hosting tab, you’ll see an SSL section.
- Make sure the toggle next to SSL is turned on. SSL (Secure Sockets Layer) is a security protocol that creates an encrypted link between a web server and a browser, ensuring that all data passed between them remains private.
- Save DNS settings:
- After adding your domain, Webflow will provide you with two records: an @ record and a CNAME record.
- The @ record should point to an IP address provided by Webflow.
- The CNAME record should point to proxy-ssl.webflow.com.
- Make sure to save these records for the next part.
Part 2: Domain.com Setup
- Access DNS settings:
- Log in to your Domain.com account.
- Click on Domains in the main menu and select My Domains.
- Click on the domain you want to connect to your Webflow site.
- On the domain page, click on DNS Records.
- Delete existing records:
- In the DNS Records section, look for any existing @ or CNAME records.
- If there are any records pointing to another service (like a different website builder), click on the Delete button next to the record.
- Add @ record:
- Click Add DNS Record.
- Select A from the Record Type dropdown menu.
- Enter @ in the Host field.
- Paste the IP address provided by Webflow in the Points To field.
- Leave the TTL field as it is, usually it’s set to 1 hour by default.
- Add CNAME record:
- Click Add DNS Record again to add another record.
- Select CNAME from the Record Type dropdown menu.
- Enter www in the Host field.
- Paste proxy-ssl.webflow.com in the Points To field.
- Save changes:
- Click Add Record to apply the changes.
Part 3: Final Steps
- Verify connection:
- Go back to your Webflow project settings.
- In the Hosting tab, click the Check status button next to your custom domain.
- If everything is set up correctly, your domain will be connected and you’ll see a green checkmark next to it.
- Publish your site:
- In your Webflow dashboard, click on the Publish button in the top right corner.
- Select your custom domain and click Publish again.
Connecting a custom domain with Domains Made Easy:
Part 1: Webflow Setup
- Add your custom domain:
- Go to your Webflow dashboard and select the project you want to connect to your custom domain.
- Click on Project Settings in the top right corner.
- In the settings menu, click on the Hosting tab.
- Under the Custom Domains section, enter your custom domain in the input field and click Add.
- Enable SSL:
- Still in the Hosting tab, you’ll see an SSL section.
- Make sure the toggle next to SSL is turned on. SSL (Secure Sockets Layer) is a security protocol that creates an encrypted link between a web server and a browser, ensuring that all data passed between them remains private.
- Save DNS settings:
- After adding your domain, Webflow will provide you with two records: an @ record and a CNAME record.
- The @ record should point to an IP address provided by Webflow.
- The CNAME record should point to proxy-ssl.webflow.com.
- Make sure to save these records for the next part.
Part 2: Domains Made Easy Setup
- Access DNS settings:
- Log in to your Domains Made Easy account.
- Click on Manage Domains in the main menu.
- Click on the domain you want to connect to your Webflow site.
- On the domain page, click on Manage DNS.
- Delete existing records:
- In the DNS Records section, look for any existing @ or CNAME records.
- If there are any records pointing to another service (like a different website builder), click on the Delete button next to the record.
- Add @ record:
- Click Add Record.
- Select A from the Record Type dropdown menu.
- Enter @ in the Host field.
- Paste the IP address provided by Webflow in the Points To field.
- Leave the TTL field as it is, usually it’s set to 1 hour by default.
- Add CNAME record:
- Click Add Record again to add another record.
- Select CNAME from the Record Type dropdown menu.
- Enter www in the Host field.
- Paste proxy-ssl.webflow.com in the Points To field.
- Save changes:
- Click Add Record to apply the changes.
Part 3: Final Step
- Verify connection:
- Go back to your Webflow project settings.
- In the Hosting tab, click the Check status button next to your custom domain.
- If everything is set up correctly, your domain will be connected and you’ll see a green checkmark next to it.
- Publish your site:
- In your Webflow dashboard, click on the Publish button in the top right corner.
- Select your custom domain and click Publish again.
Connecting a custom domain with Namecheap:
Part 1: Webflow Setup
- Add your custom domain:
- Go to your Webflow dashboard and select the project you want to connect to your custom domain.
- Click on Project Settings in the top right corner.
- In the settings menu, click on the Hosting tab.
- Under the Custom Domains section, enter your custom domain in the input field and click Add.
- Enable SSL:
- Still in the Hosting tab, you’ll see an SSL section.
- Make sure the toggle next to SSL is turned on. SSL (Secure Sockets Layer) is a security protocol that creates an encrypted link between a web server and a browser, ensuring that all data passed between them remains private.
- Save DNS settings:
- After adding your domain, Webflow will provide you with two records: an @ record and a CNAME record.
- The @ record should point to an IP address provided by Webflow.
- The CNAME record should point to proxy-ssl.webflow.com.
- Make sure to save these records for the next part.
Part 2: Namecheap Setup
- Access DNS settings:
- Log in to your Namecheap account.
- Click on Domain List in the left sidebar.
- Click on Manage next to the domain you want to connect to your Webflow site.
- On the domain page, click on the Advanced DNS tab.
- Delete existing records:
- In the Host Records section, look for any existing @ or CNAME records.
- If there are any records pointing to another service (like a different website builder), click on the Trash icon next to the record.
- Add @ record:
- Click Add New Record.
- Select A Record from the Type dropdown menu.
- Enter @ in the Host field.
- Paste the IP address provided by Webflow in the Value field.
- Leave the TTL field as it is, usually it’s set to Automatic.
- Add CNAME record:
- Click Add New Record again to add another record.
- Select CNAME Record from the Type dropdown menu.
- Enter www in the Host field.
- Paste proxy-ssl.webflow.com in the Value field.
- Save changes:
- Click the green checkmark to save each record.
Part 3: Final Steps
- Verify connection:
- Go back to your Webflow project settings.
- In the Hosting tab, click the Check status button next to your custom domain.
- If everything is set up correctly, your domain will be connected and you’ll see a green checkmark next to it.
- Publish your site:
- In your Webflow dashboard, click on the Publish button in the top right corner.
- Select your custom domain and click Publish again.
Connecting a custom domain with Bluehost:
Part 1: Webflow Setup
- Add your custom domain:
- Go to your Webflow dashboard and select the project you want to connect to your custom domain.
- Click on Project Settings in the top right corner.
- In the settings menu, click on the Hosting tab.
- Under the Custom Domains section, enter your custom domain in the input field and click Add.
- Enable SSL:
- Still in the Hosting tab, you’ll see an SSL section.
- Make sure the toggle next to SSL is turned on. SSL (Secure Sockets Layer) is a security protocol that creates an encrypted link between a web server and a browser, ensuring that all data passed between them remains private.
- Save DNS settings:
- After adding your domain, Webflow will provide you with two records: an @ record and a CNAME record.
- The @ record should point to an IP address provided by Webflow.
- The CNAME record should point to proxy-ssl.webflow.com.
- Make sure to save these records for the next part.
Part 2: Bluehost Setup
- Access DNS settings:
- Log in to your Bluehost account.
- Click on Domains in the main menu and select Manage.
- Click on the domain you want to connect to your Webflow site.
- On the domain page, click on the DNS tab.
- Delete existing records:
- In the Records section, look for any existing @ or CNAME records.
- If there are any records pointing to another service (like a different website builder), click on the Delete button next to the record.
- Add @ record:
- Click Add Record.
- Select A from the Type dropdown menu.
- Enter @ in the Host Record field.
- Paste the IP address provided by Webflow in the Points To field.
- Leave the TTL field as it is, usually it’s set to 4 hours by default.
- Add CNAME record:
- Click Add Record again to add another record.
- Select CNAME from the Type dropdown menu.
- Enter www in the Host Record field.
- Paste proxy-ssl.webflow.com in the Points To field.
- Save changes:
- Click Save to apply the changes.
Part 3: Final Steps
- Verify connection:
- Go back to your Webflow project settings.
- In the Hosting tab, click the Check status button next to your custom domain.
- If everything is set up correctly, your domain will be connected and you’ll see a green checkmark next to it.
- Publish your site:
- In your Webflow dashboard, click on the Publish button in the top right corner.
- Select your custom domain and click Publish again.
Connecting a custom domain with iONOS:
Part 1: Webflow Setup
- Add your custom domain:
- Go to your Webflow dashboard and select the project you want to connect to your custom domain.
- Click on Project Settings in the top right corner.
- In the settings menu, click on the Hosting tab.
- Under the Custom Domains section, enter your custom domain in the input field and click Add.
- Enable SSL:
- Still in the Hosting tab, you’ll see an SSL section.
- Make sure the toggle next to SSL is turned on. SSL (Secure Sockets Layer) is a security protocol that creates an encrypted link between a web server and a browser, ensuring that all data passed between them remains private.
- Save DNS settings:
- After adding your domain, Webflow will provide you with two records: an @ record and a CNAME record.
- The @ record should point to an IP address provided by Webflow.
- The CNAME record should point to proxy-ssl.webflow.com.
- Make sure to save these records for the next part.
Part 2: iONOS Setup
- Access DNS settings:
- Log in to your iONOS account.
- Click on Domains & SSL in the main menu.
- Click on the domain you want to connect to your Webflow site.
- On the domain page, click on the DNS tab.
- Delete existing records:
- In the DNS Settings section, look for any existing @ or CNAME records.
- If there are any records pointing to another service (like a different website builder), click on the Delete button next to the record.
- Add @ record:
- Click Add Record.
- Select A from the Type dropdown menu.
- Enter @ in the Hostname field.
- Paste the IP address provided by Webflow in the IPv4 Address field.
- Add CNAME record:
- Click Add Record again to add another record.
- Select CNAME from the Type dropdown menu.
- Enter www in the Hostname field.
- Paste proxy-ssl.webflow.com in the Alias field.
- Save changes:
- Click Save to apply the changes.
Part 3: Final Steps
- Verify connection:
- Go back to your Webflow project settings.
- In the Hosting tab, click the Check status button next to your custom domain.
- If everything is set up correctly, your domain will be connected and you’ll see a green checkmark next to it.
- Publish your site:
- In your Webflow dashboard, click on the Publish button in the top right corner.
- Select your custom domain and click Publish again.
Connecting a custom domain with Cloudflare:
Part 1: Webflow Setup
- Add your custom domain:
- Go to your Webflow dashboard and select the project you want to connect to your custom domain.
- Click on Project Settings in the top right corner.
- In the settings menu, click on the Hosting tab.
- Under the Custom Domains section, enter your custom domain in the input field and click Add.
- Enable SSL:
- Still in the Hosting tab, you’ll see an SSL section.
- Make sure the toggle next to SSL is turned on. SSL (Secure Sockets Layer) is a security protocol that creates an encrypted link between a web server and a browser, ensuring that all data passed between them remains private.
- Save DNS settings:
- After adding your domain, Webflow will provide you with two records: an @ record and a CNAME record.
- The @ record should point to an IP address provided by Webflow.
- The CNAME record should point to proxy-ssl.webflow.com.
- Make sure to save these records for the next part.
Part 2: Cloudflare Setup
- Access DNS settings:
- Log in to your Cloudflare account.
- Click on the domain you want to connect to your Webflow site.
- On the domain page, click on the DNS tab.
- Delete existing records:
- In the DNS Records section, look for any existing @ or CNAME records.
- If there are any records pointing to another service (like a different website builder), click on the X button next to the record.
- Add @ record:
- Click Add Record.
- Select A from the Type dropdown menu.
- Enter @ in the Name field.
- Paste the IP address provided by Webflow in the IPv4 address field.
- Leave the TTL field as it is, usually it’s set to Auto.
- Make sure the Proxy status is set to DNS only.
- Add CNAME record:
- Click Add Record again to add another record.
- Select CNAME from the Type dropdown menu.
- Enter www in the Name field.
- Paste proxy-ssl.webflow.com in the Target field.
- Leave the TTL field as it is, usually it’s set to Auto.
- Make sure the Proxy status is set to DNS only.
- Save changes:
- Click Save to apply the changes.
Part 3: Final Steps
- Verify connection:
- Go back to your Webflow project settings.
- In the Hosting tab, click the Check status button next to your custom domain.
- If everything is set up correctly, your domain will be connected and you’ll see a green checkmark next to it.
- Publish your site:
- In your Webflow dashboard, click on the Publish button in the top right corner.
- Select your custom domain and click Publish again.
Reminder:
Remember, DNS changes can take up to 48 hours to propagate throughout the entire internet, but usually it happens much faster. If your site isn’t live after 48 hours, you should reach out to support for further assistance.
.png)

.png)


.png)
.png)