


.svg)
One of the standout features of Webflow is its robust integration capabilities, connecting with a wide range of third-party tools and services. Whether you want to enhance your site's functionality with Google Analytics, streamline marketing efforts with Mailchimp, or automate workflows through Zapier, Webflow's integrations provide unlimited possibilities.
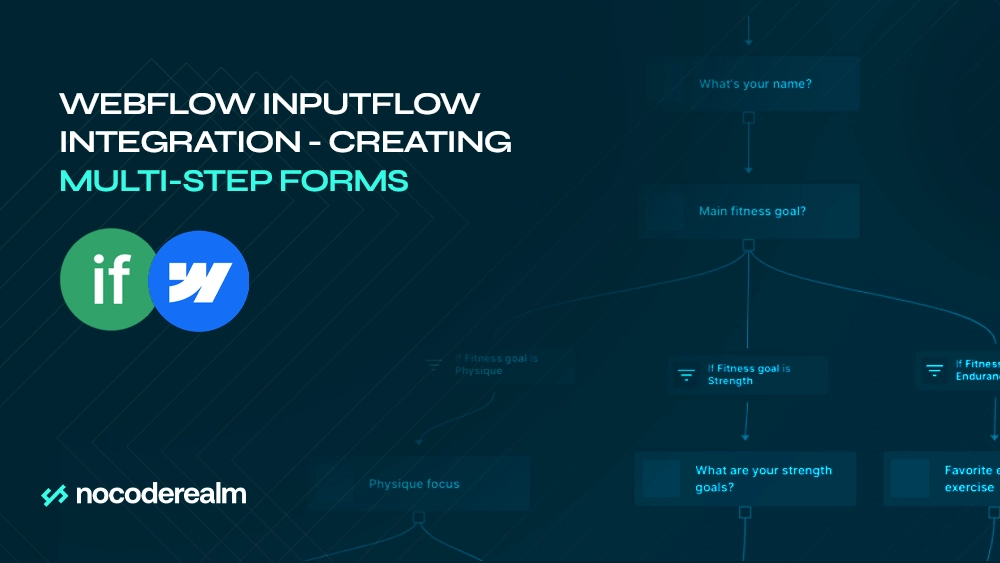
But what about when it comes to managing forms? Do you need to collect big loads of data from your website visitors? The solution for that is Inputflow, a powerful tool designed to simplify the creation of multi-step forms. Inputflow allows everyone to develop the most advanced features that forms can have. Combined with Webflow, this tool offers a comprehensive solution for building better multi-step and user-tailored forms.
What is Inputflow?
Inputflow is a tool in the Webflow marketplace that allows everyone to create multi-step forms. It offers you complete design control over your form, in contrast to other similar solutions. After creating each step of the form inside Webflow, you can add the multi-step feature, and you’re set to go! You can customize the forms even more by adding custom error messages, branching, and calculations.

Inputflow use cases
Do you want to take your website's user experience to the next level? The purpose of multi-step forms is to enhance the user experience by breaking down lengthy forms into manageable sections, reducing overwhelm, and therefore, improving completion rates. They are applicable in scenarios requiring detailed information, such as onboarding processes, application forms, and complex surveys.
For instance, an e-commerce site might use multi-step forms to collect customer details, shipping information, and payment methods in separate steps. Similarly, a job application form can be divided into sections for personal information, employment history, and education. By guiding users through a step-by-step process, multi-step forms make data entry more organized and Inputflow can help us with that.
Single-step vs. Multi-step forms
When it comes down to form design, one crucial decision is whether to use single-step or multi-step forms. Both approaches have their advantages and are suitable for different scenarios. Understanding the strengths and limitations of each can help you choose the best format for your needs. In this section, I will detail the differences between single-step and multi-step forms, highlighting their respective use cases and benefits.
Single-step forms
Imagine, for the first time, visiting a website and being faced with an overwhelming amount of questions that must be answered in order to express your concern. This isn't the optimal situation and a perfect example of how to NOT use single-step forms.
In single-step forms all fields are combined into one page (step), saving users time and avoiding multiple steps in completing the form. These are perfect for short, straightforward forms like newsletter sign-ups, feedback surveys, and contact information. Because they are simple to use and don't require a lot of steps, they are effective for gathering the least amount of data.
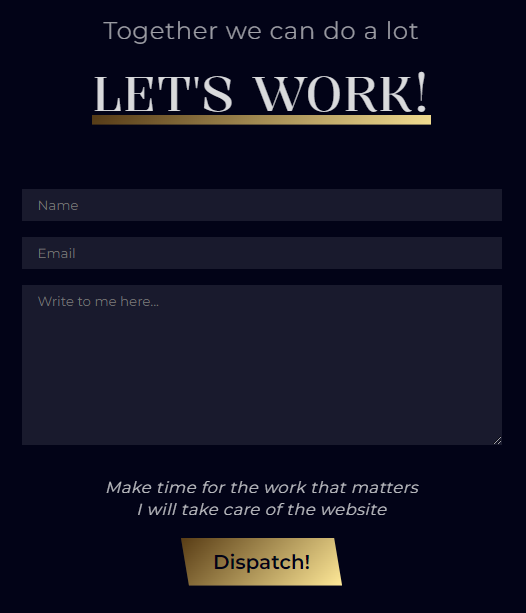
The example above is the Call To Action single-step form on my website. The process of filling it is very simple. Users just have to enter their name and email, and then write the message they want to send me. Just as if they are sending an email. This is an applicable use of single-step forms because there is a small number of inputs and they don’t need to be separated into different steps.
Multi-step forms
Multi-step forms, on the other hand, divide the form into several pages or steps, guiding users through a step-by-step process. This format is beneficial for longer, more complex forms where collecting detailed information is necessary.
Personalized content massively contributes to a higher conversion rate for businesses. According to these stats on Forbes, a large part of online consumers are very likely to purchase from a brand that makes personalized offers. One of the main characteristics of multi-step forms is personalization, and that is why these types of forms are considered when tailored user experience is needed.
By breaking down the form into smaller, manageable chunks, multi-step forms reduce user overwhelm and can lead to higher completion rates. Examples include job applications, registration forms for events, and e-commerce checkout processes.
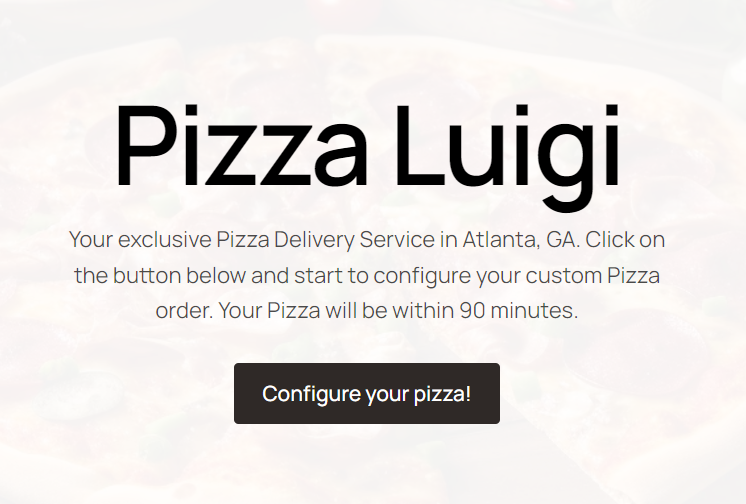
A very simple, yet effective, multi-step form is the Pizza Configurator made by Inputflow’s team.
Set up a Multi-step Inputflow form in your Webflow project (Step-by-Step Guide)
For this detailed guide, I developed a simple Webflow project price calculator. We ask the user some questions about a Webflow project, and based on the information the user gives us we show him an estimated price for the project. The project is very basic, but more than enough for you to understand how to make forms with multiple steps, separate forms into branches, and perform calculations with Inputflow.
First, we will ask the visitor whether he wants a Junior, Medior, or Senior developer, so we can determine the hourly rate. Then, we are asking for layout complexity and the number of pages so we know how much work needs to be done. At last, we ask if the client needs integrations. If yes, we ask what integrations are required, otherwise, we show the the project's cost.
To begin with, I will mention that in order to start this project, you will need a paid Webflow Workspace/Site plan. The reason for that is the requirement for custom code integration, which is not available in free plans. Don’t worry we don’t need to write any code, we will just copy one line to establish the connection between Inputflow and our Webflow project.
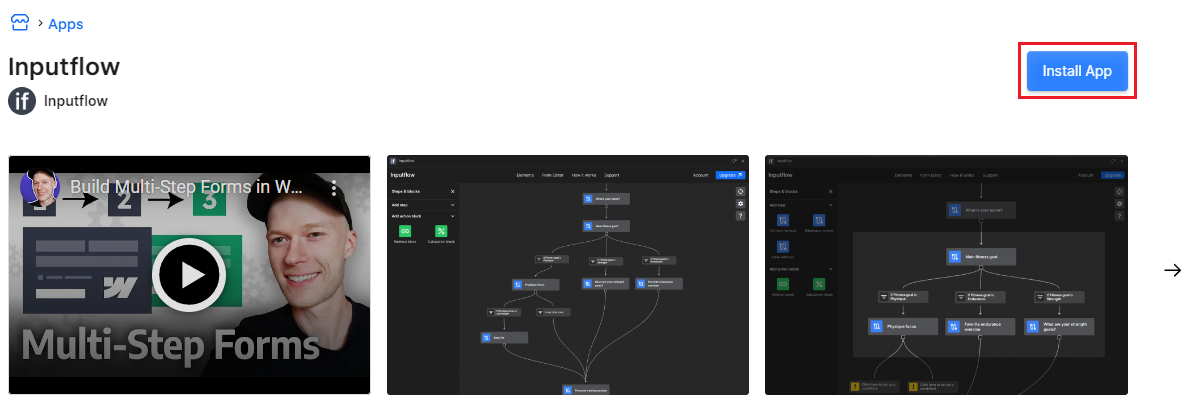
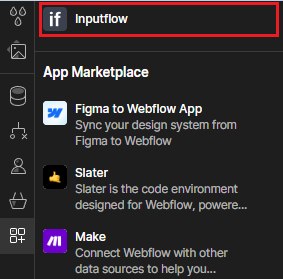
- To install a Webflow app, you can go to the Webflow Apps Marketplace. There you will search for Inputflow and install that app.
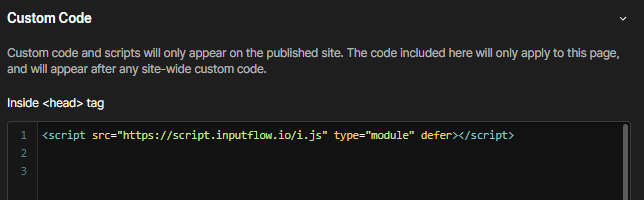
- After installation, open up your Webflow project and select the page where you plan to have the multi-step form. In the page settings go to the custom code integration section. Then, you can paste the following line of code in the text area that says ‘Inside <head> tag’.
<script src="https://script.inputflow.io/i.js" type="module" defer></script>
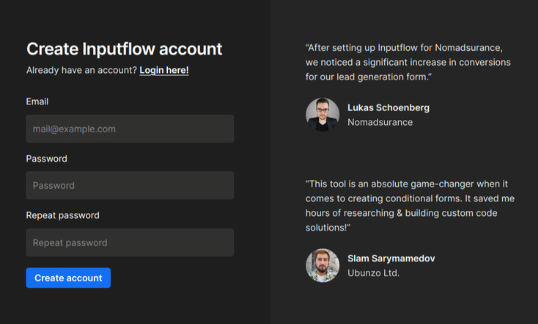
- Now we have installed the app and connected the script. The next thing is to create an Inputflow account, which I suppose you don’t have. If you have one, you can skip this step.
By the way, this Inputflow account is separate from your Webflow account. Because Inputflow has paid features, you need to make an account so you can later pay for those features if you want to.
Go ahead and launch the Inputflow app. You can find it in the Apps section on the left-hand side of Webflow’s project designer.
After launch, a dialog will pop up asking to create an account.
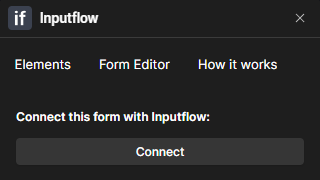
- Now, we need to tell Inputflow what form we want to manage inside the editor, i.e. turn into a multi-step form. To do that, select the form and launch Inputflow. While the form is selected, click on the button that says ‘Connect’.
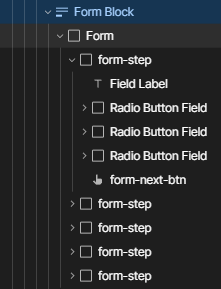
- After successfully connecting the form, you need to structure your form into multiple steps. This might sound confusing, but it’s more simple than you think. Just group your form elements into different Div Blocks that represent each step. In my situation, I’ve given these groups a class name of ‘form-step’, so I (and you) can identify my steps more easily. So, just put the elements that should show up together, in the same Div Block (i.e. step).
- Next, we need to tell Inputflow that we’ve separated our elements into steps. To do that, select the first step you created and click on the ‘Step’ button inside Inputflow.
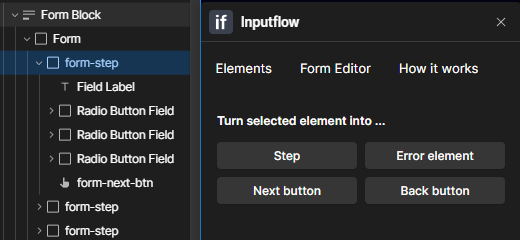
You will be prompted to name your step, and the best way to name it is the actual question you ask the website visitor during that step of the form.

Click on ‘Create Step’ to finish the creation of the first step. Iterate this process over every step you have in your form, and make sure to give them proper names.
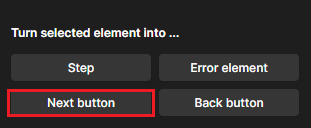
- In the same way you created the steps, you can create the Next and Back buttons, so the users can navigate through the form. Just put a button that says something like ‘Next’ in the first step, select the button, and click the ‘Next button’ inside of Inputflow.
This button will now serve the function of moving to the next step. You can now copy and paste this button in every step of your form, so the user can progress forward to each step. The very same thing can be done with the ‘Back’ buttons, you just have to click the ‘Back button’ on the Inputflow interface. When you have both the Next and Back buttons set up, the users can move back and forth between the steps.
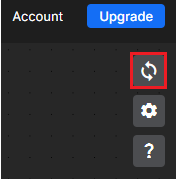
- Now we need to load all these steps and buttons in the form editor. To do that, publish your website to the staging domain and then open Inputflow. In Inputflow’s menu select ‘Form Editor’ and in the top-right corner select the first button, which will load the elements.
- Finally, it is time to add the multi-step functionality. After you have loaded the elements, they should appear in the menu on the left-hand side. Just drag and drop them onto the canvas and sort them in the correct order. Then connect them by dragging the square below each step and dropping at the next step.
If you need a video tutorial on how to do this, you can check this one:
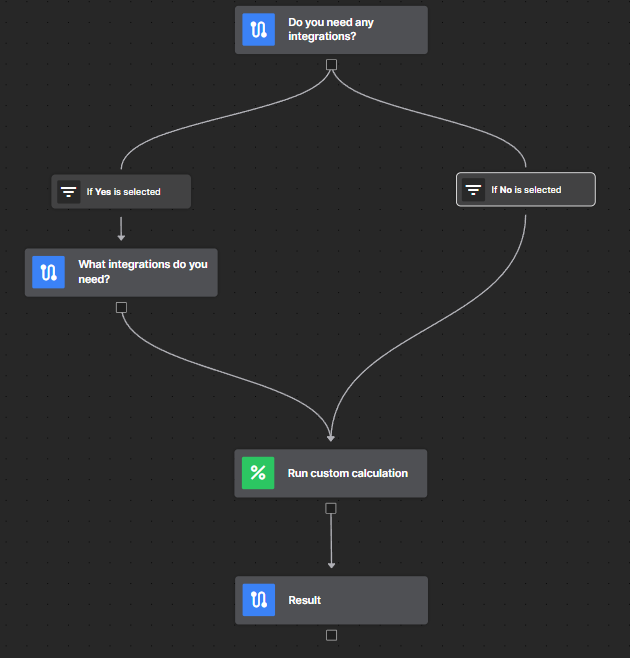
After connecting my inputs, my canvas looks like this:
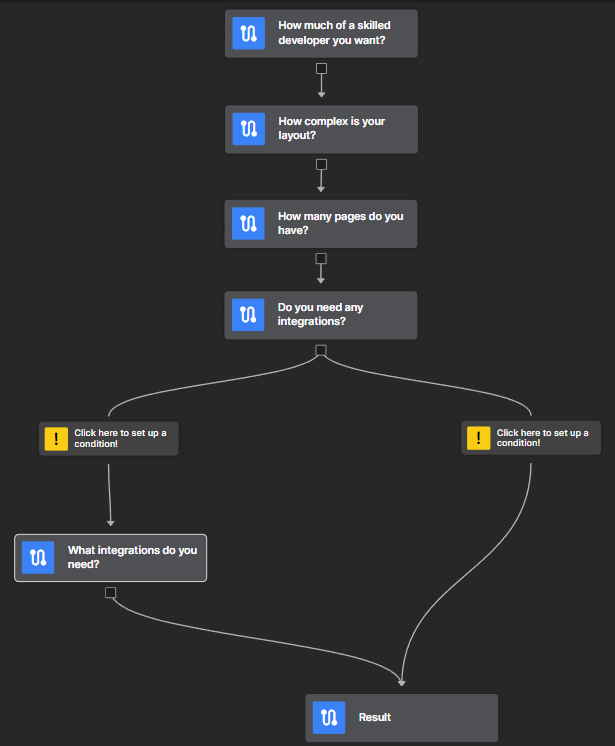
Your canvas will look a little bit different, based on the number of inputs you have and the amount of logic you applied to your form. In my form, I have added only one branch, because that is all I needed.
- The branching logic is the next thing to be done. In my scenario, I ask the user whether integrations are needed for the site. If he answers positively, I go to the step where I ask him what are the needed integrations, otherwise, I go straight to the next step, which is, in this case, the result.
Now to add the conditional logic, I will start with the first condition (the left one in the image). When I clicked on the condition, the condition menu opened and here I will configure the logic. Click on ‘Create Condition’ to get the same interface as in the image below.
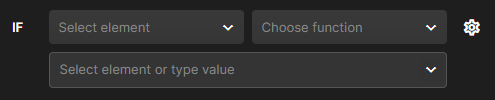
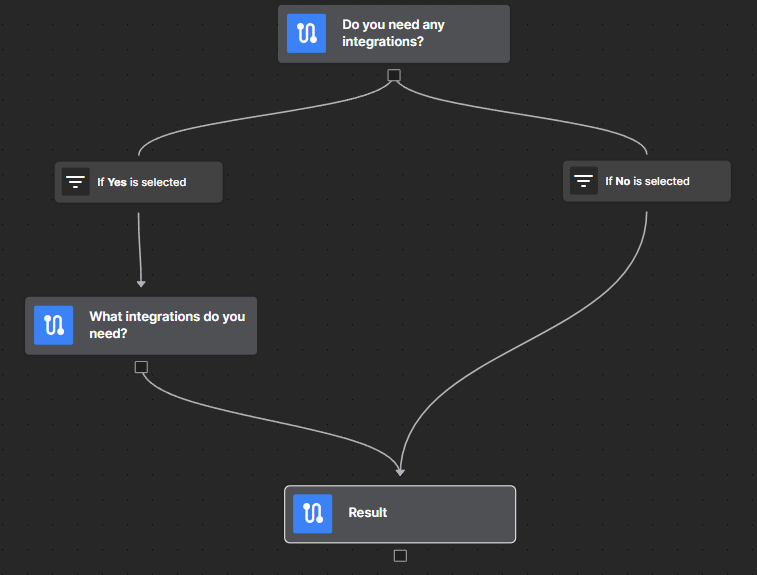
Now just fill in the inputs with the function your conditional logic needs to perform. For me, I chose the Radio element that says ‘Yes’, and the function ‘is selected’. That literally means: “If the user selected the ‘Yes’ option”. So now, the interface from the previous image turned into:

This condition means that if the user answers ‘Yes’, show him the integration selection step. I did the very same thing for the other condition, just with the ‘No’ option. Now this part of my canvas looks like this:
Now I have a big form, divided into smaller steps, with applied branching logic to it, which makes it personalized.
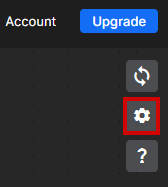
- For the functionality (i.e. calculate the price of the project) we need to perform a calculation based on the information the user gave us. The first thing we need to do is to create a variable in which we can store the price. To do that, we go to the form settings, which is the gear button in the top-right corner.
In the menu, we click on ‘Variables’. Here the variables menu opens and we can see that Inputflow already has two pre-made variables: price and score.
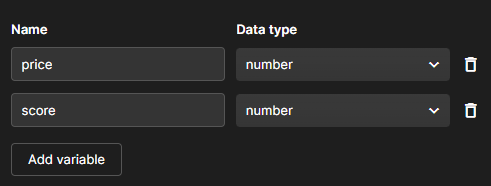
For this project, I don’t need the score variable, so I will delete it by clicking the trash can on the right side of the variable. That way I only have the variable I need (price). But, if you need more than one variable for your project, feel free to rename the score variable, or add a new variable by clicking the button ‘Add variable’.
Now that we have a place to store our price in, we can do the calculation. The best way to perform a calculation in Inputflow is using the calculation block. In the form editor, I drag and drop the green calculation block from the left side to the canvas, and I put it right before I show the result.
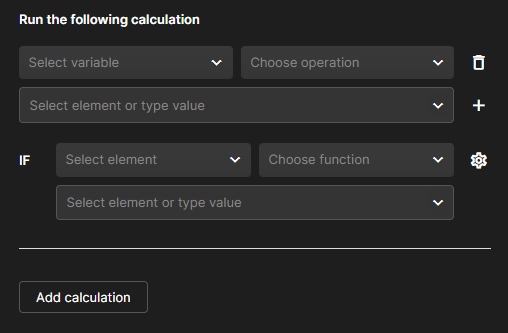
To set the calculation formula, just click on the calculation block and select ‘Create Calculation’ from the menu. In the new interface, you configure the math operation you want to perform on the variables you’ve made when a certain condition is met.
And of course, if you need more calculations, you don’t need to add more calculation blocks in the editor. You can just click on the ‘Add calculation’ button and you are set to configure your next calculation.
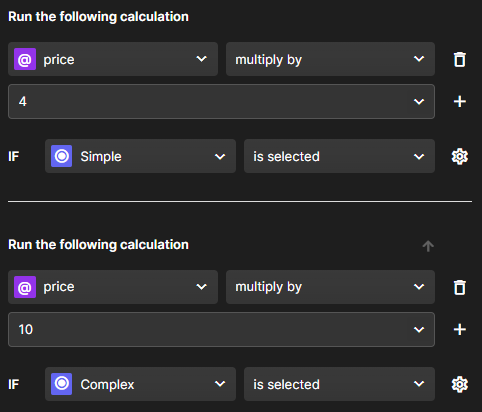
For example, I want to begin by setting the hourly rate and later multiply that rate by the estimated hours of work that are needed. So, the logic here would go: “If the user chose the option for a Junior developer, set the hourly rate of 25$, but if he chose the Senior developer, go with the hourly rate of 50$”.
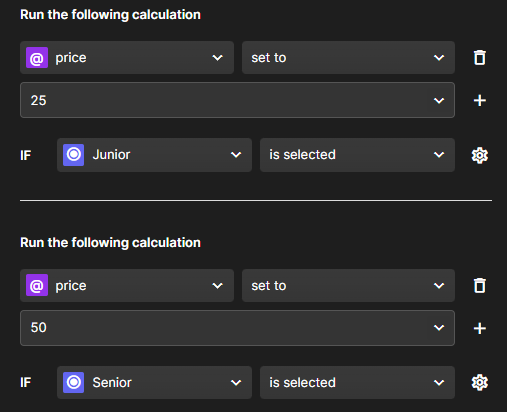
I also configured to set the hourly rate to 35$ for the Medior Developer option. After that, I can use the information the user gave me about the complexity of the layout. If the layout is simple, I can estimate that in 4 hours the layout will be done (for 1 page). If the layout is complex, I can multiply the hourly rate by 10 hours, for example.
And the list of calculations goes on and on. I don’t need to show any more calculations, because you got the idea. The process of making a calculation is the same, you just change the math operation you perform or the condition (or both). In your project, you will add calculations as much as you need.
- For the last part, we just need to display the price at the end of the form, and this process is very simple. We go to the Webflow Designer and find the element in which we want to display the price. It can be a text block, paragraph, span, etc. In that element, we simply write @[variableName], where instead of variableName you write the actual name for your variable. For me, that would be @[price], because my variable is named ‘price’.

Then, I published the website and opened it in the browser. I went to the last step of the form and it looked like this:
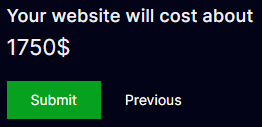
And that’s what we wanted! We now have the result calculated by Inputflow and displayed visually on the site.
The functionality Inputflow offers goes way beyond this. We can do a lot more, for example:
- Redirect the users to other sites
- Make more advanced conditions
- Add custom error messages
- Validate the forms on the frontend.
You can use Inputflow for all these features I listed, and if you want to learn how to do these things, you can check out their documentation and their YouTube channel.
Inputflow Pricing plan
The Inputflow tool is completely free to use for designing your forms and their characteristics. You only need to pay for publishing to your real (production) domain, but you can test and use the multi-step forms on the staging domain for free.
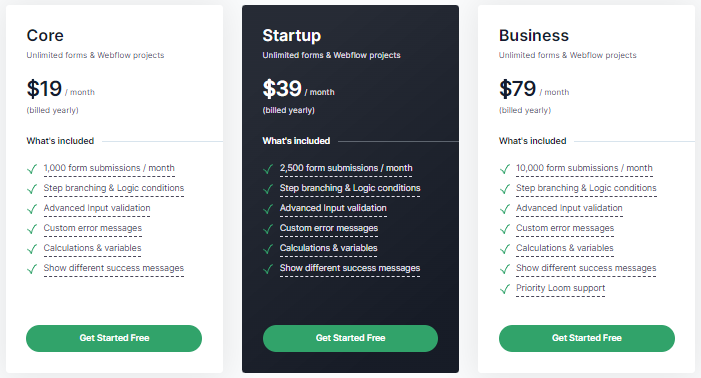
Inputflow offers three plans: Core, Startup, and Business. They pretty much offer the same features in every plan, except for the number of form submissions.
In the Core plan users are limited to 1000 monthly submissions, while in the Startup plan, they are limited to 2500 submissions/month. In their best offer, the Business plan limits the users to 10000 submissions per month. Their pricing plans and features are detailed below. Note that these prices apply when they are billed yearly.
What are the alternatives to Inputflow?
Typeform
This is a no-code tool that enables users to create their own forms and integrate them into their websites. It has more strict limitations in the pricing plans, but it’s more intuitive and has a lot of templates to choose from for your forms.
Wized
This is another no-code tool that is responsible for developing the logic and interactivity of the website. Wized is not tailored for making forms, but you can create multi-step forms and develop interactivity on other pages as well. It is a better choice than Inputflow, only if you plan to build more complex websites, like web applications so that you can use one tool for both the multi-step forms, and for other parts of the app as well (by the way, Wized does a very good job as an API).
Coding
If coding is an option, you can code-inject this functionality in Webflow. If you are a client, it can cost you a little bit more to pay the developer to do this kind of feature on your site, but it will pay off over time because you won’t spend money on the Inputflow monthly plan.
.png)

.png)


.png)
.png)